
Re-verify Individual - Remediate Individual and Re-run Workflow
A key question that customers often ask is what to do when they have attempted to run a verification and have subsequently received a failure response.
Generally, there are several ways a customer can fail a data verification or KYC check, this includes:
- Collected information is incorrect or invalid around the name, date of birth, address, or document number. [No Match]
- Insufficient information was provided as a result of missing fields in the API request.
- Offline data source connectors.
How to remediate a failed verification by re-running a workflow
Step 1. Identify the source of the failed verification
To trace the cause of a failed verification, refer to the original workflow execution response or retrieve the workflow results again. As previously mentioned, ensure you provide the entityId, service name, and workflow name.
curl --location 'https://api.uat.frankie.one/v2/individuals/{entityId}/serviceprofiles/kyc/workflows/safe_harbour_gov_id/executions/01HYHHQC3PS2592R5S3HX9B1FV' \
--header 'api_key: {{your_apiKey}}' \
--header 'X-Frankie-CustomerID: {{your_CustomerID}}' \
--header 'X-Frankie-CustomerChildID: {{your_CustomerChildID}}' \
--header 'Content-Type: application/json' \
Upon unsuccessful verification, the workflow result will look similar to the following example (highlighted in blue):
{
  "requestId": "{requestId}",
  "workflowResult": {
    "serviceProfileId": "{serviceProfileId}",
    "entityId": "{entityId}",
    "workflowId": "{workflowId}",
    "workflowName": "{workflowName}",
    "workflowExecutionId": "{workflowExecutionId}",
    "workflowExecutionState": "COMPLETED",
    "workflowResult": "FAIL",
    "status": "FAIL",
    "riskAssessment": {...},
    "issues": {...},
    "steps": {...},
    "entityType": "INDIVIDUAL",
    "startedAt": "2024-05-29T07:42:41.674Z",
    "endedAt": "2024-05-29T07:42:41.674Z",
    "endWorkflowName": "NextWorkflow",
    "workflowStepResults": [...],
  },
  "individual": {...}
}
The workflowExecutionState is “COMPLETED” which tells us that the workflow itself has been executed to completion. The workflowResult however, has returned as a “FAIL” indicating that not all verifications have passed.
The best approach to identify a failed verification is to expand and investigate the issues that have been identified. In the following example, the issues are highlighted in blue.
{
  "workflowResult": {
    "issues": [
        {
          "issueId": "{issueId}",
          "workflowExecutionId": "{workflowExecutionId}",
          "stepResultId": "{workflowExecutionId}",
          "createdAt": "2024-05-29T23:56:13.914Z",
          "category": "VERIFY",
          "issue": "NOT_FOUND",
          "severity": "BLOCK",
        }
    ]
}
As observed, the entity verification failed due to the absence of any matches. This could be attributed to invalid or misspelt information provided during the onboarding process.
Step 2. Modify the fields relevant to the failed verification
There is a possibility that the onboarding entity merely misspelt their name during the application process and that on request, a correction to their name could be collected from them. In these cases, a re-verification of their personal information should result in success.
Consider the following request to update an entity’s givenName to “James” and familyName to “Done”:
curl --location --request PATCH 'https://api.uat.frankie.one/v2/individuals/{entityId} \
--header 'api_key: {{your_apiKey}}' \
--header 'X-Frankie-CustomerID: {{your_CustomerID}}' \
--header 'X-Frankie-CustomerChildID: {{your_CustomerChildID}}' \
--header 'Content-Type: application/json' \
--data '{
    "individual": {
        "name":
            {
                "givenName": "James",
                "familyName": "Done"
            }
				}
}'
Step 3. Re-execute the workflow
Once the entity’s personal information has been corrected, you can re-execute the workflow to obtain a new set of verification results.
curl --location --request POST 'https://api.uat.frankie.one/v2/individuals/{entityId}/serviceprofiles/{serviceName}/workflows/{workflowName}/execute' \
--header 'api_key: {{your_apiKey}}' \
--header 'X-Frankie-CustomerID: {{your_CustomerID}}' \
--header 'X-Frankie-CustomerChildID: {{your_CustomerChildID}}' \
--header 'Content-Type: application/json' \
Note on re-verifying the entity's personal information
Typically, FrankieOne does not re-verify the entity’s personal information unless the information itself has changed. As the name information had been updated, the entity’s personal information would be re-verified.
Step 4. Inspect the results to determine the updated status
Upon successful completion of the workflow, you’ll notice a “PASS” status, indicating that the re-verification has been successful.
{
  "requestId": "{requestId}",
  "workflowResult": {
    "serviceProfileId": "{serviceProfileId}",
    "entityId": "{entityId}",
    "workflowId": "{workflowId}",
    "workflowName": "{workflowName}",
    "workflowExecutionId": "{workflowExecutionId}",
    workflowExecutionState": "COMPLETED",
    "workflowResult": "PASS",
    "status": "PASS",
    "riskAssessment": {...},
    "steps": {...},
    "entityType": "INDIVIDUAL",
    "startedAt": "2024-05-29T07:42:41.674Z",
    "endedAt": "2024-05-29T07:42:41.674Z",
    "endWorkflowName": "NextWorkflow",
    "workflowStepResults": [...],
  },
  "individual": {...}
}
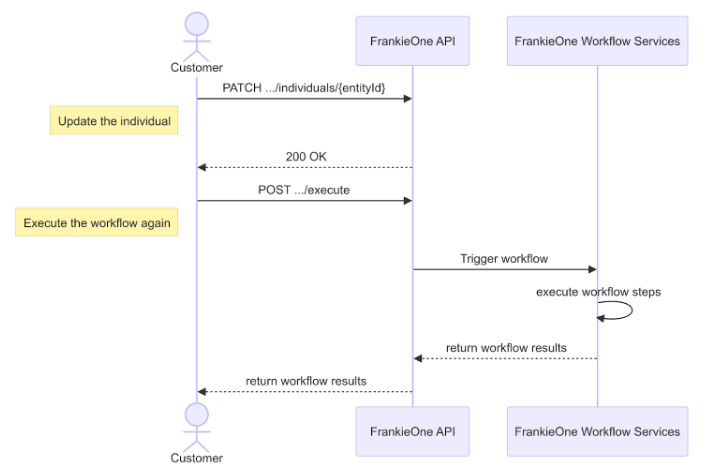
Diagram to show the sequence of calls
Portal steps
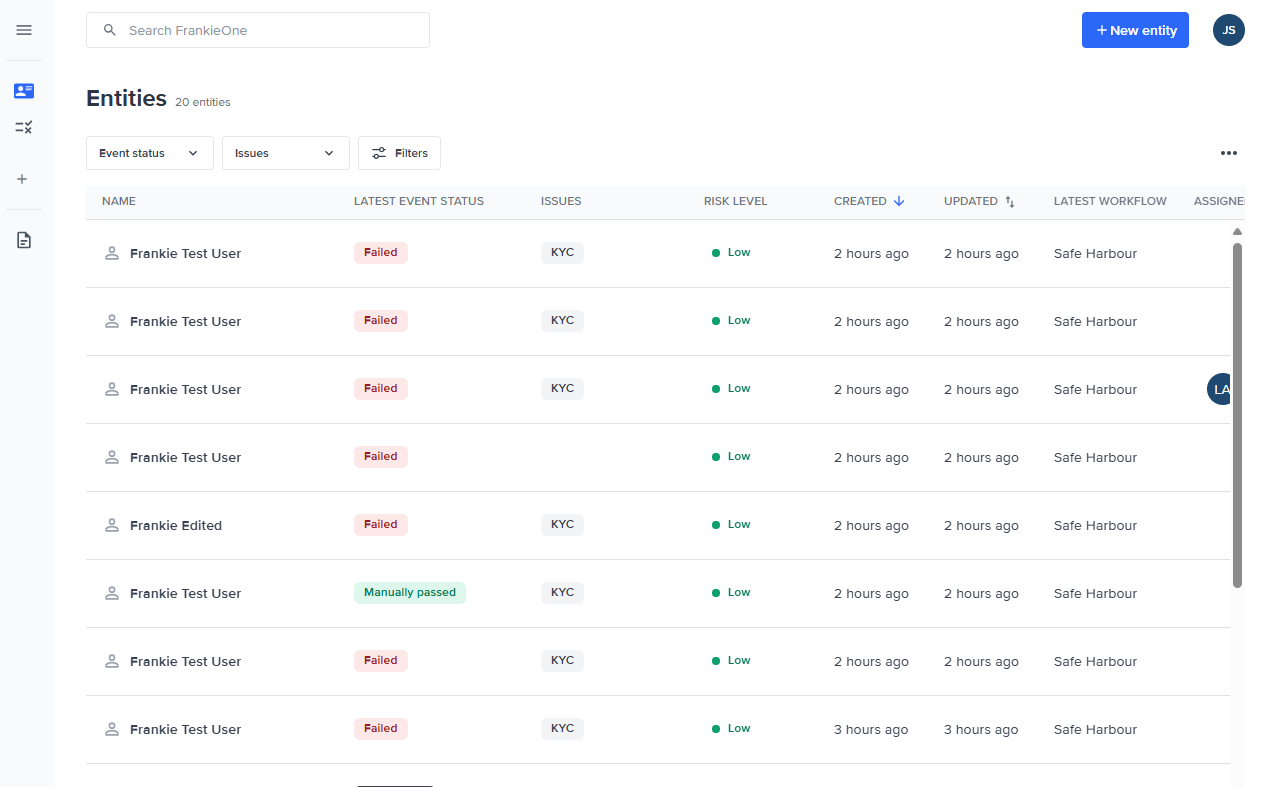
Step 1. Search and select an entity to review
Once logged in, the default view of the user is the Entities list page. This allows users to search or filter entities created.
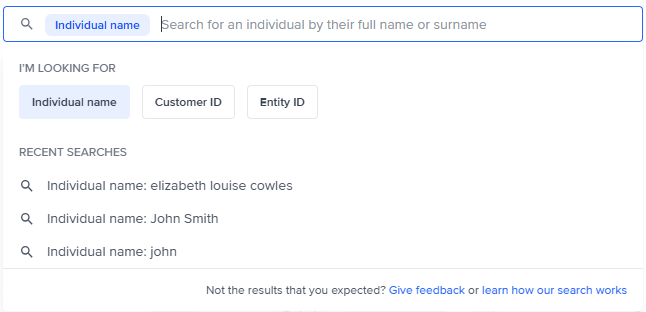
The global search bar allows the user to search by Individual Name, Customer ID, and Entity ID.
You can use the Search bar to search for profiles by Individual Name, Customer ID, and Entity ID.
You can use the filters and refine the results by Workflow Status and Issues.
Selecting the Filters button opens the Advanced Filters menu to allow you to further refine your search. You can filter by Profile Status, Risk level, Date range, Workflow name and Assignee.
Step 2. View Entity workflow events and Resolve
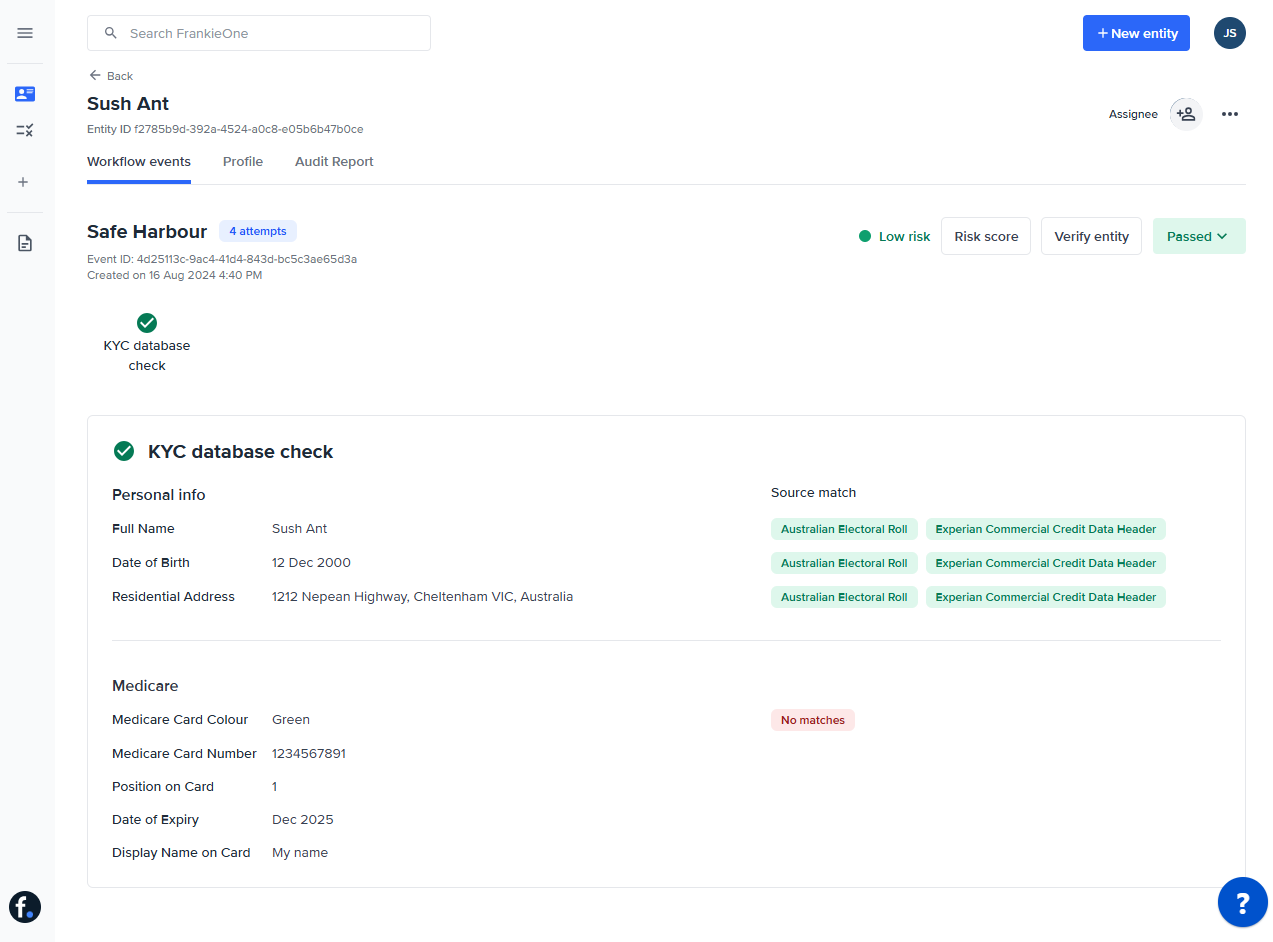
The Workflow events page is the default view upon selecting an entity. This allows you to:
- See the latest workflow ran against an entity
- Assign another user to the entity
- See risk levels and override risk score
- See workflow status and override it (if needed)
- See a summary of the checks executed in a workflow
- See details of the check results separated by section
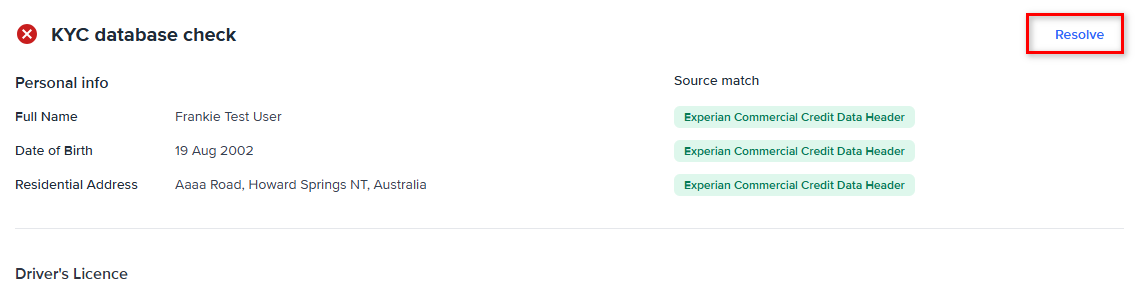
If there is an issue with an entity, failure indicators will be reflected in the check details.
A “Resolve” button will be displayed at the top right corner of the section leading the user to the Resolve entity page.
Step 3. Resolve entity
The Resolve entity page will allow users to remediate any failure indicators as stated in the previous page.
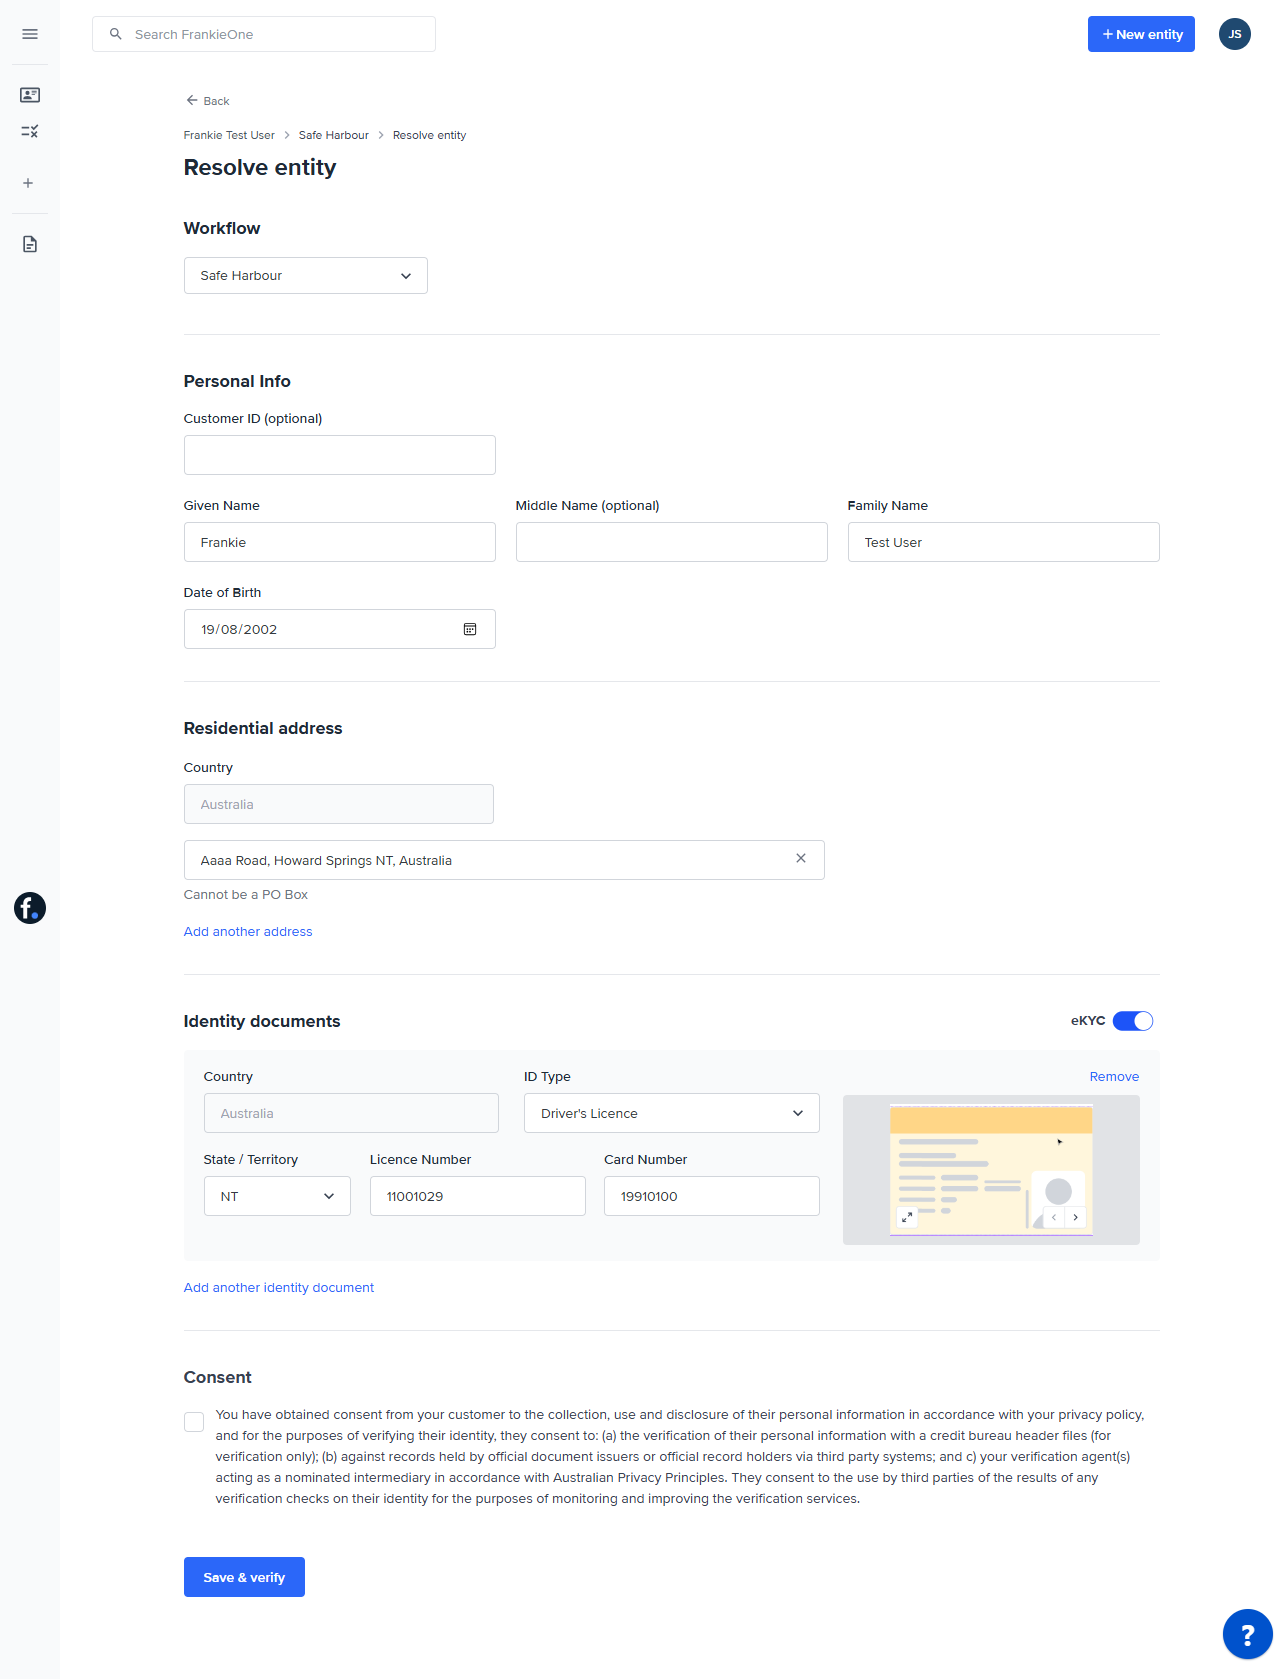
As the aim is to resolve the issue against the entity, Save and verify is the only button displayed.
Updated 9 days ago