
Create a new profile via the Portal
The New Profile screen allows for a customer’s personal information to be input and checked.
The New Profile screen allows you to input a customer’s personal information and run checks.
A new customer profile may be created via API or manually via the portal.
To create a New Profile via the portal
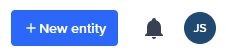
Navigate to the New Profile form by clicking the New Entity button.
Profile Type
You can create an Individual or Business profile type.

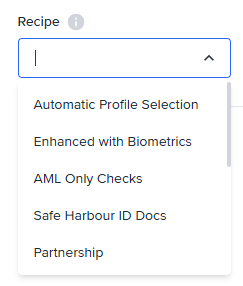
Select a Recipe
Select the Recipe you would like to apply to your new customer profile. This will determine the checks that are run on this customer.
Personal Info
Use the form fields to enter the customer’s personal information. Fields will be optional or required based on the recipe and your FrankieOne configuration.

Personal Information Fields
| Customer ID | Made up of numbers and or letters and no spacing. Search by Customer ID using the search bar on the Onboarding or Monitoring lists. |
| First Name | The customer’s First Name as shown on their ID document. Required field for all customer profiles. * Also known as Given Name. |
| Middle Name | Middle name is an optional field Enter a middle name if it is shown on the customer’s ID document. |
| Last Name | The customer’s Last Name as shown on their ID document. Also known as Surname or Family Name |
| Date of Birth | - The customer’s Date of Birth |
| Phone Number | - Optional field |
| Email Address | Optional field Must be a valid email address format |
Addresses
Use the address search field to quickly find an address and populate it into the correct fields.

Or select Add address manually to dropdown the individual address fields.

Add an ID Document
Click Add New Document to add an ID document to a customer profile.
Different Recipes will have different requirements for the number and type of ID documents required and this will be set up in your FrankieOne configuration.

Drag and drop to upload a document scan or browse and select a file from your computer.

Consent
You must obtain Consent from your customer as per the AML/CTF act to run certain checks. You will not be able to Save and Verify where consent is required as part of the selected Recipe.

Save & Verify
Clicking Save & Verify will save the changes to the profile and run all of the checks required as per the selected recipe. If checks have been run previously, FrankieOne will decide which, if any, further checks need to be run and which do not need to be run again.
Save Changes
Clicking Save changes will save changes to the profile and any new information or information that has been changed after checks have already been run will show as ‘Unchecked’.
If changes were made that do not impact on the result of previous checks, these results will remain.
If a new ID document has been added and saved, and a different ID document has previously passed, the original document will remain as passed.
Updated 5 months ago