
FrankieOne Single Sign-On (SSO) with Okta
Prerequisites
Ensure you've obtained the metadata from FrankieOne for your environment.
Procedure
-
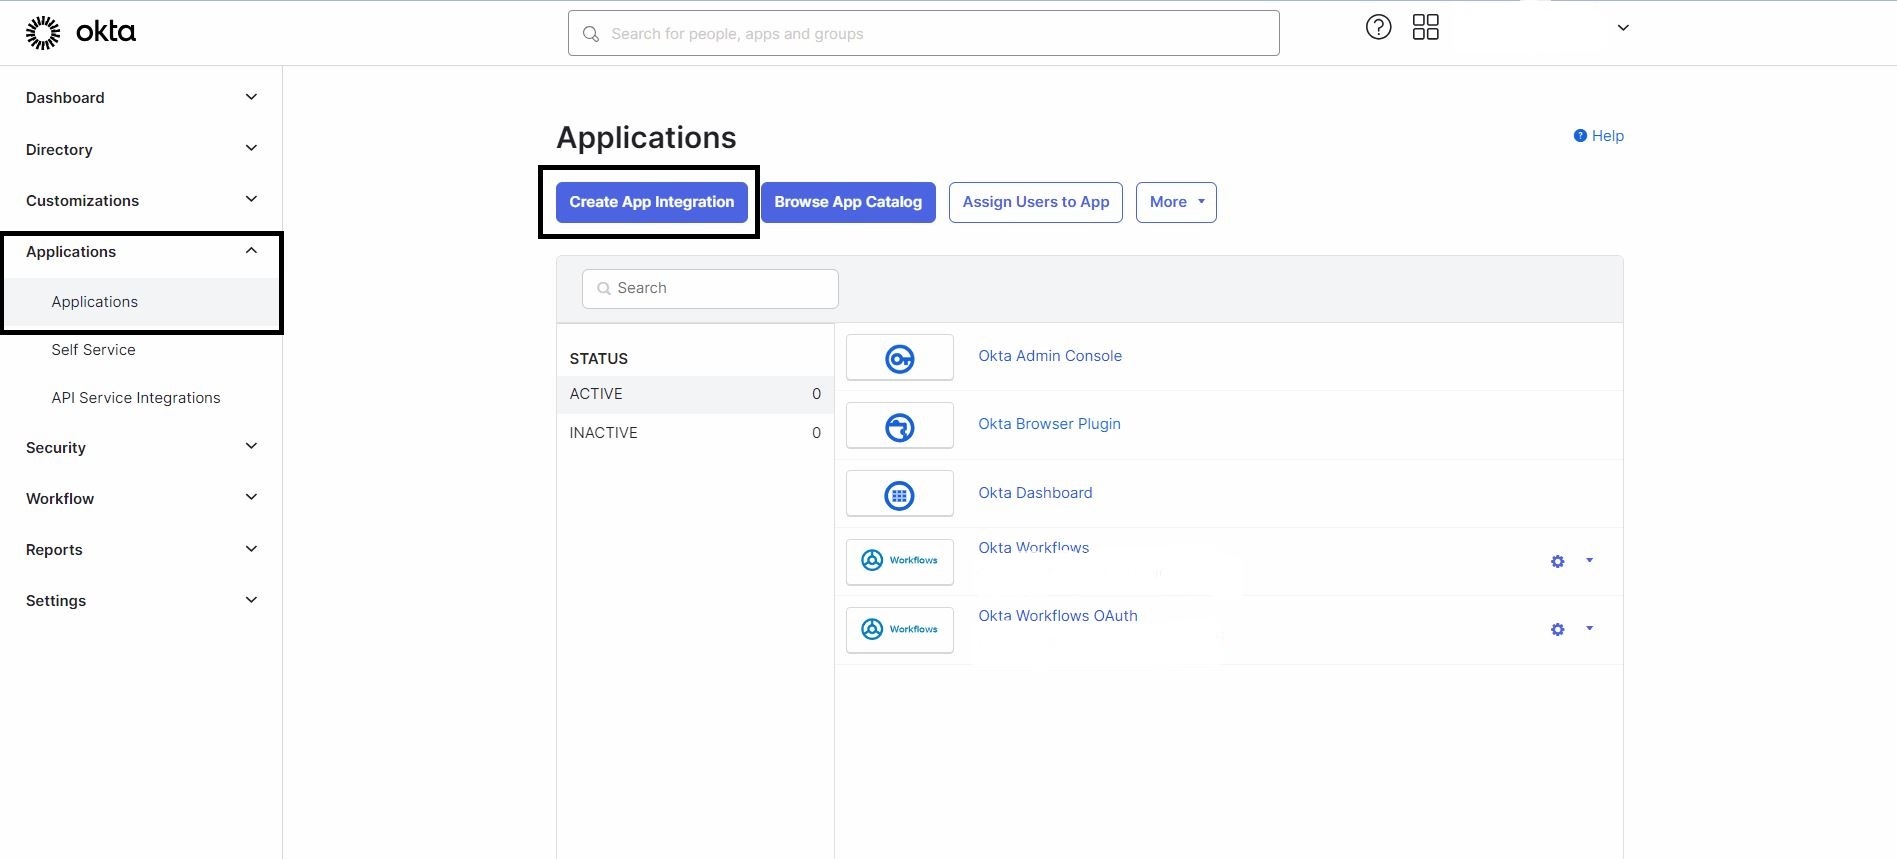
Navigate to the Okta Admin Dashboard > Applications > Applications > Create App Integration.
-
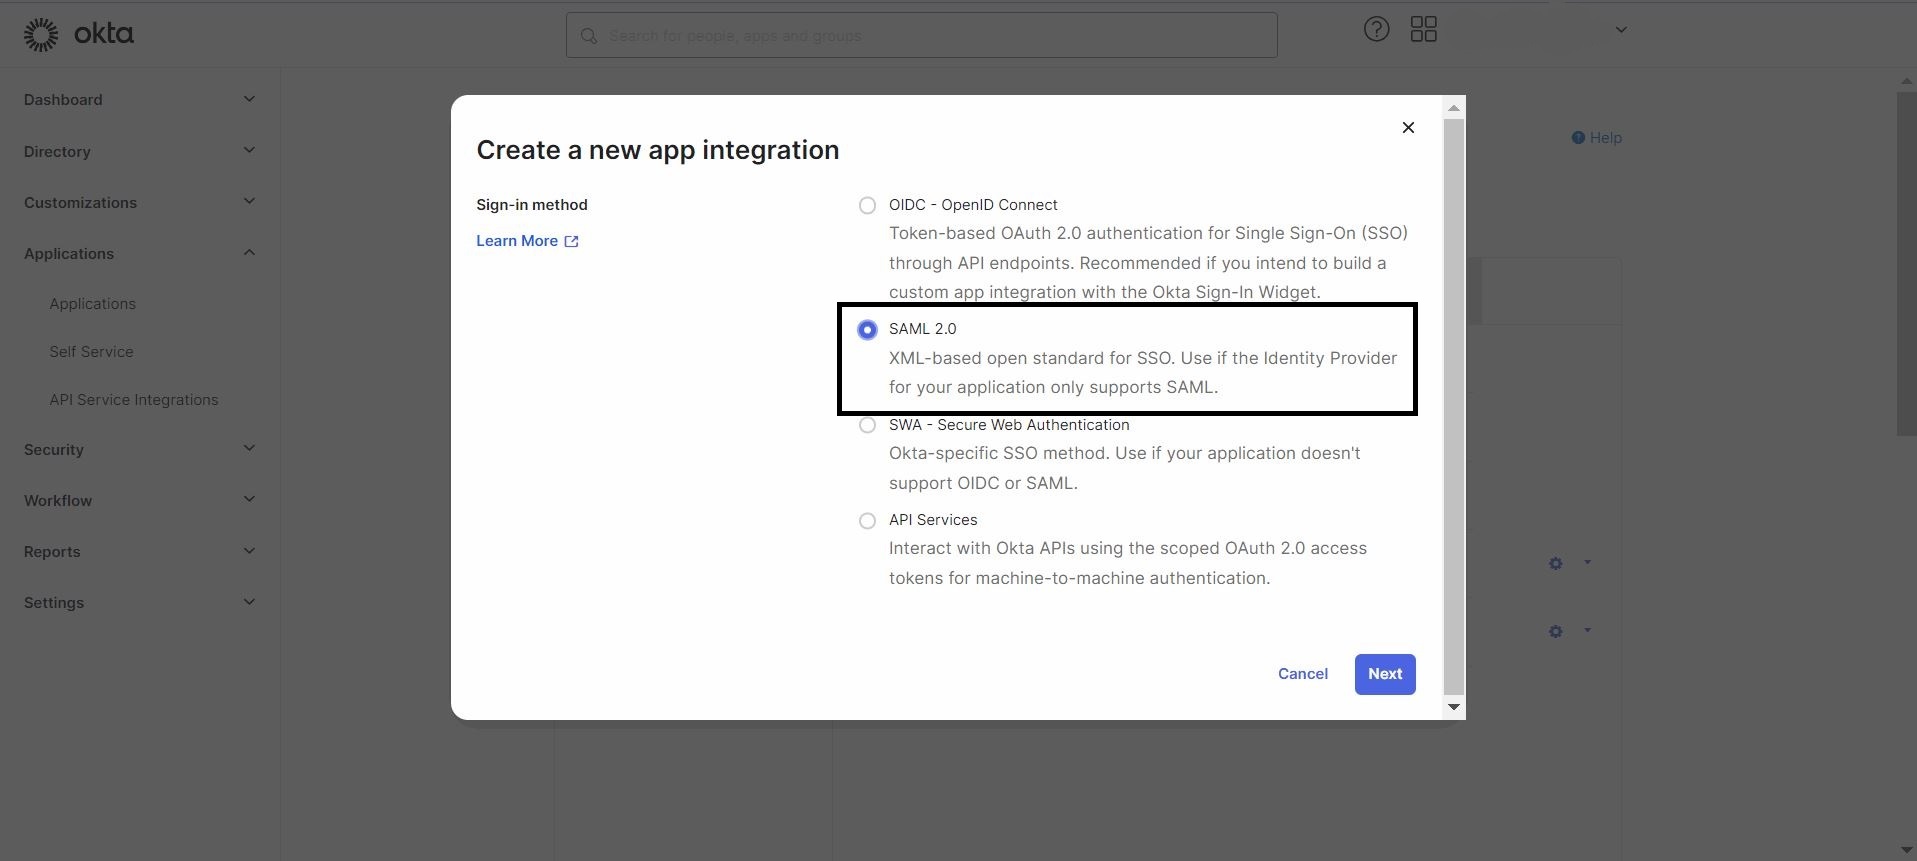
Choose the SAML 2.0 option and select Next.
-
In the General Settings tab, assign a name to your application and select Next.

-
In the Configure SAML tab, use the metadata provided by FrankieOne to fill in the details under the General section as follows:
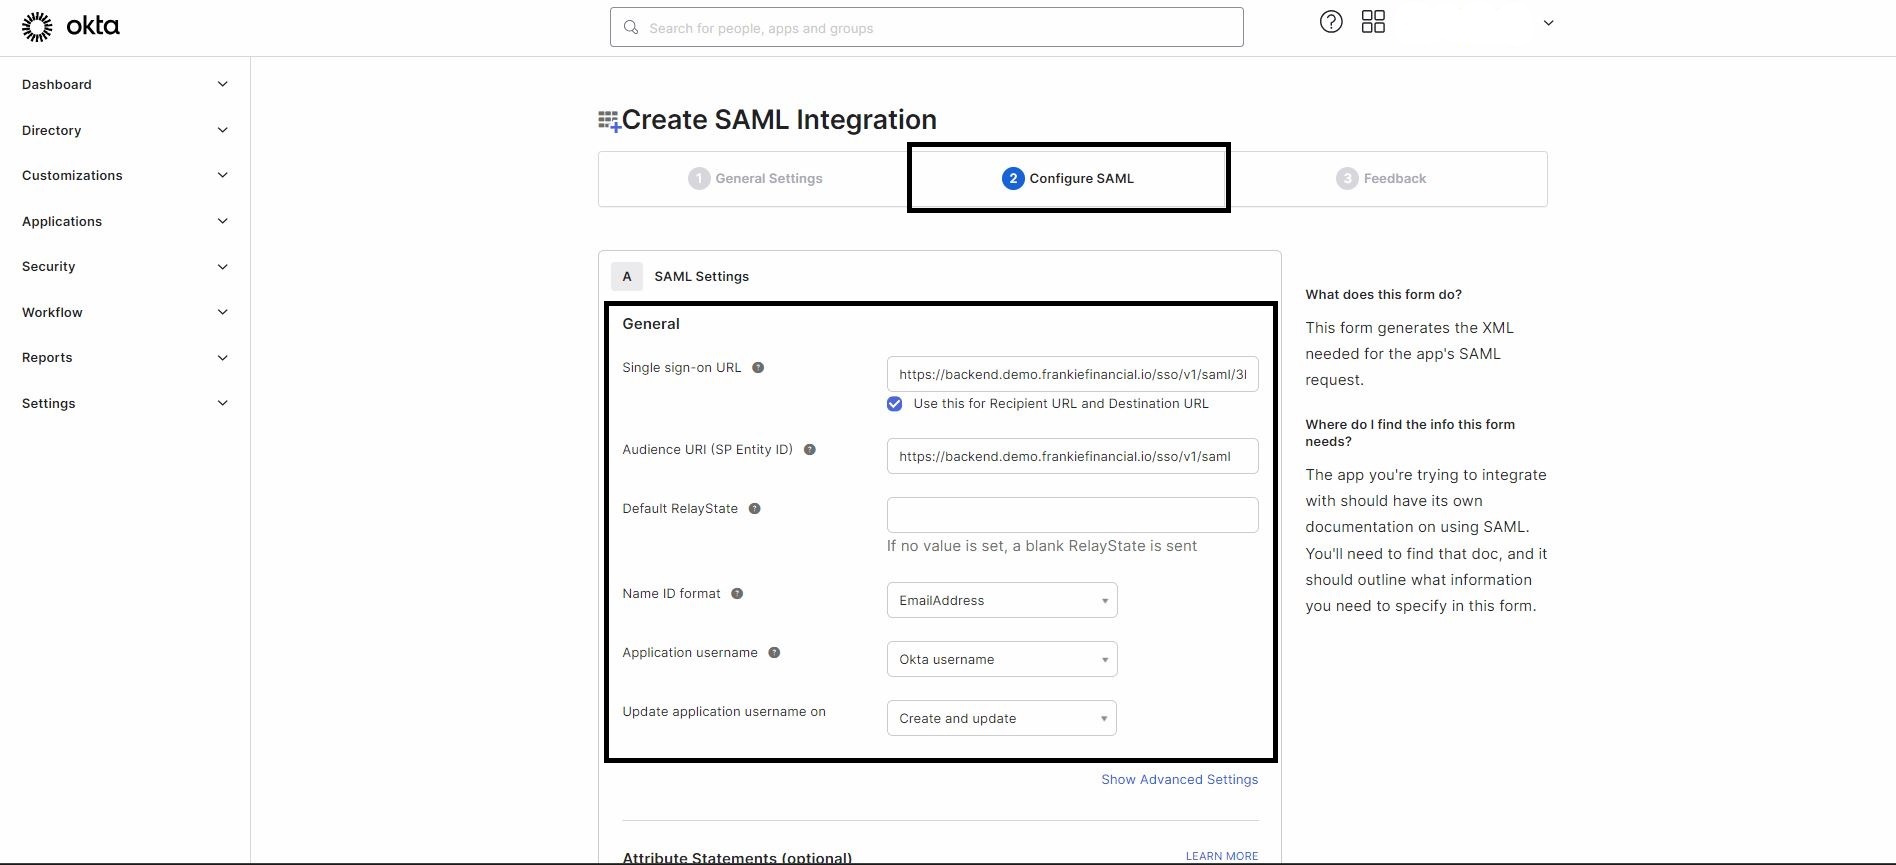
- Single sign-on URL:
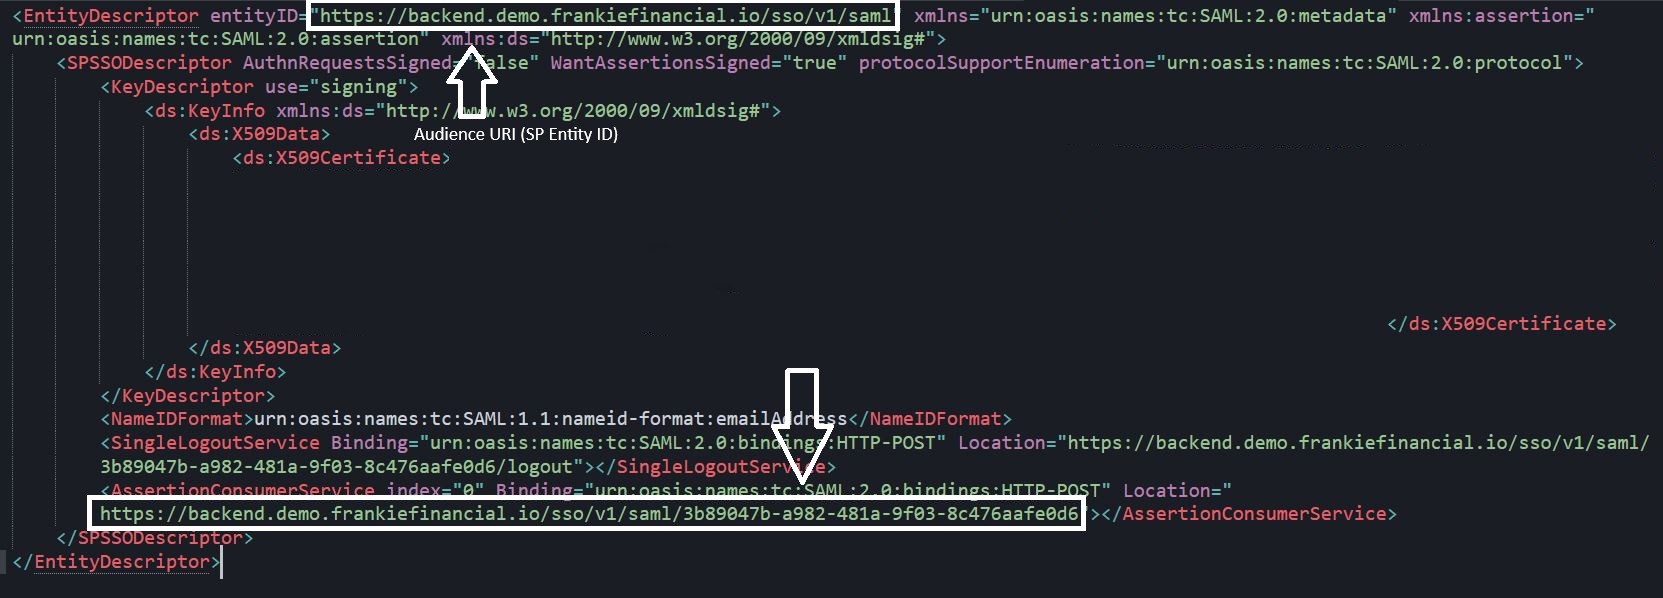
<AssertionConsumerService.Location value from the metadata> - Audience URL (SP Entity ID):
<EntityDescriptor.entityID value from the metadata> - Default RelayState:
<Leave it blank> - Name ID format: Choose
Emailaddressfrom the drop-down options. - Application username: Choose
Okta usernamefrom the drop-down options. - Update application username on: Choose
Create and updatefrom the drop-down options.
- Single sign-on URL:
-
In the Attribute Statements (optional) section, add attributes as shown in the screenshot.
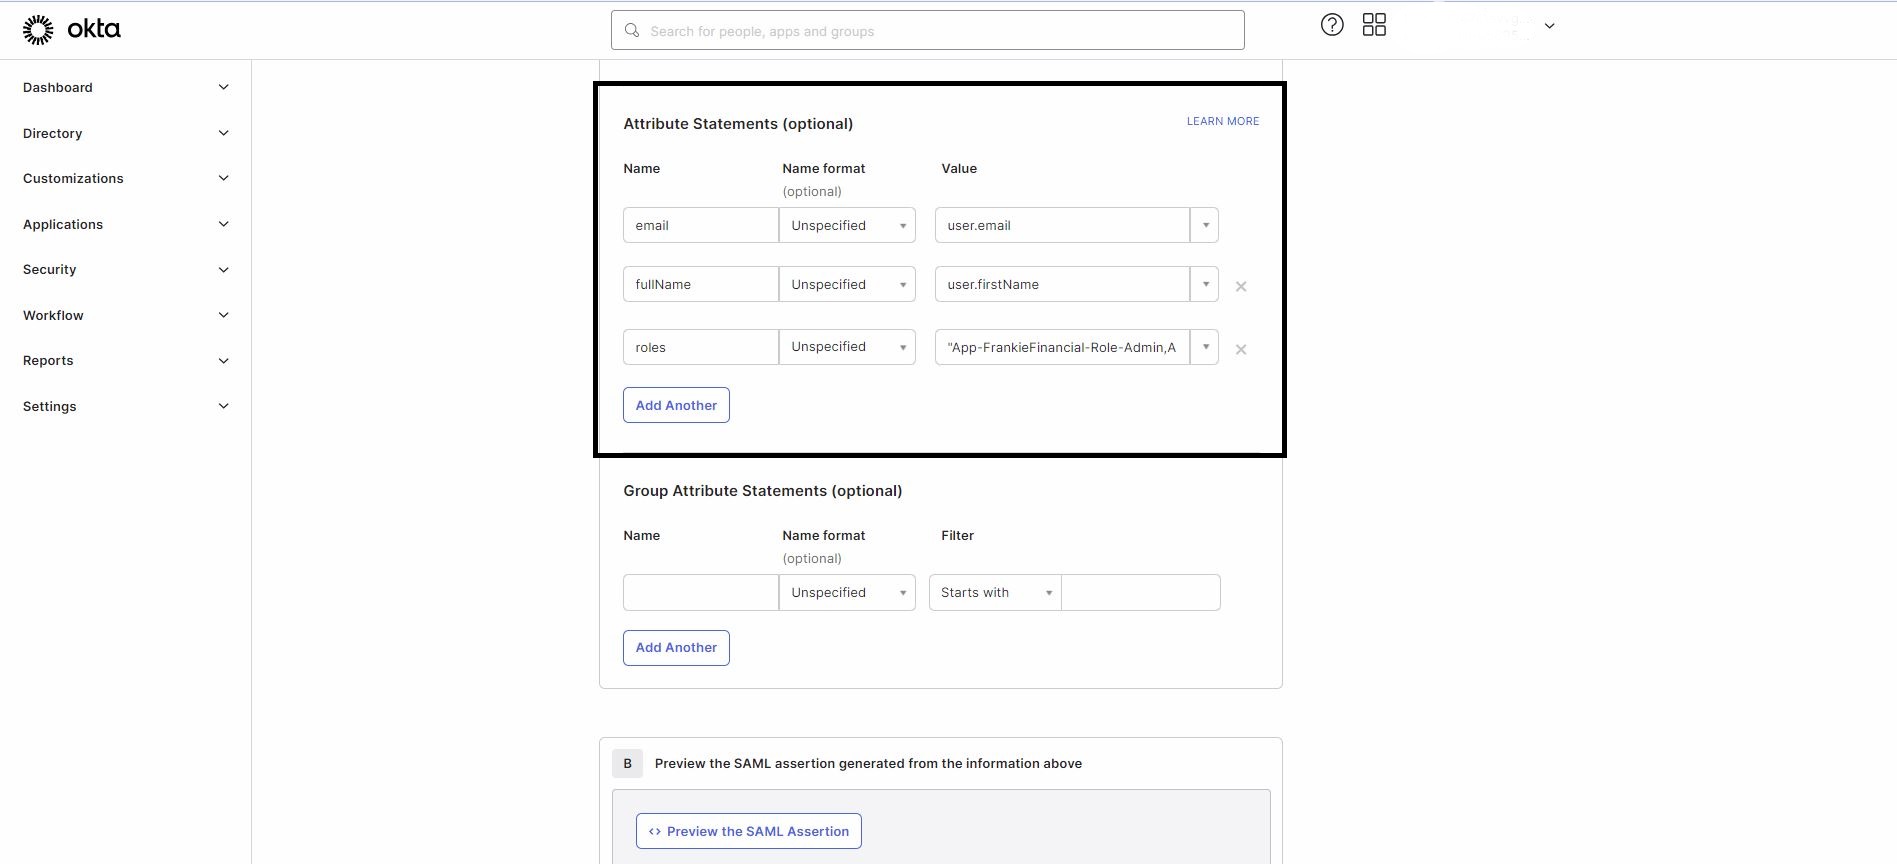
Note: All three attributes shown in the screenshot are mandatory. The “roles” attribute can have multiple values separated by a comma and enclosed in double quotes.
-
Select Next, then go to the Feedback tab, where you can choose the appropriate option based on your setup.
-
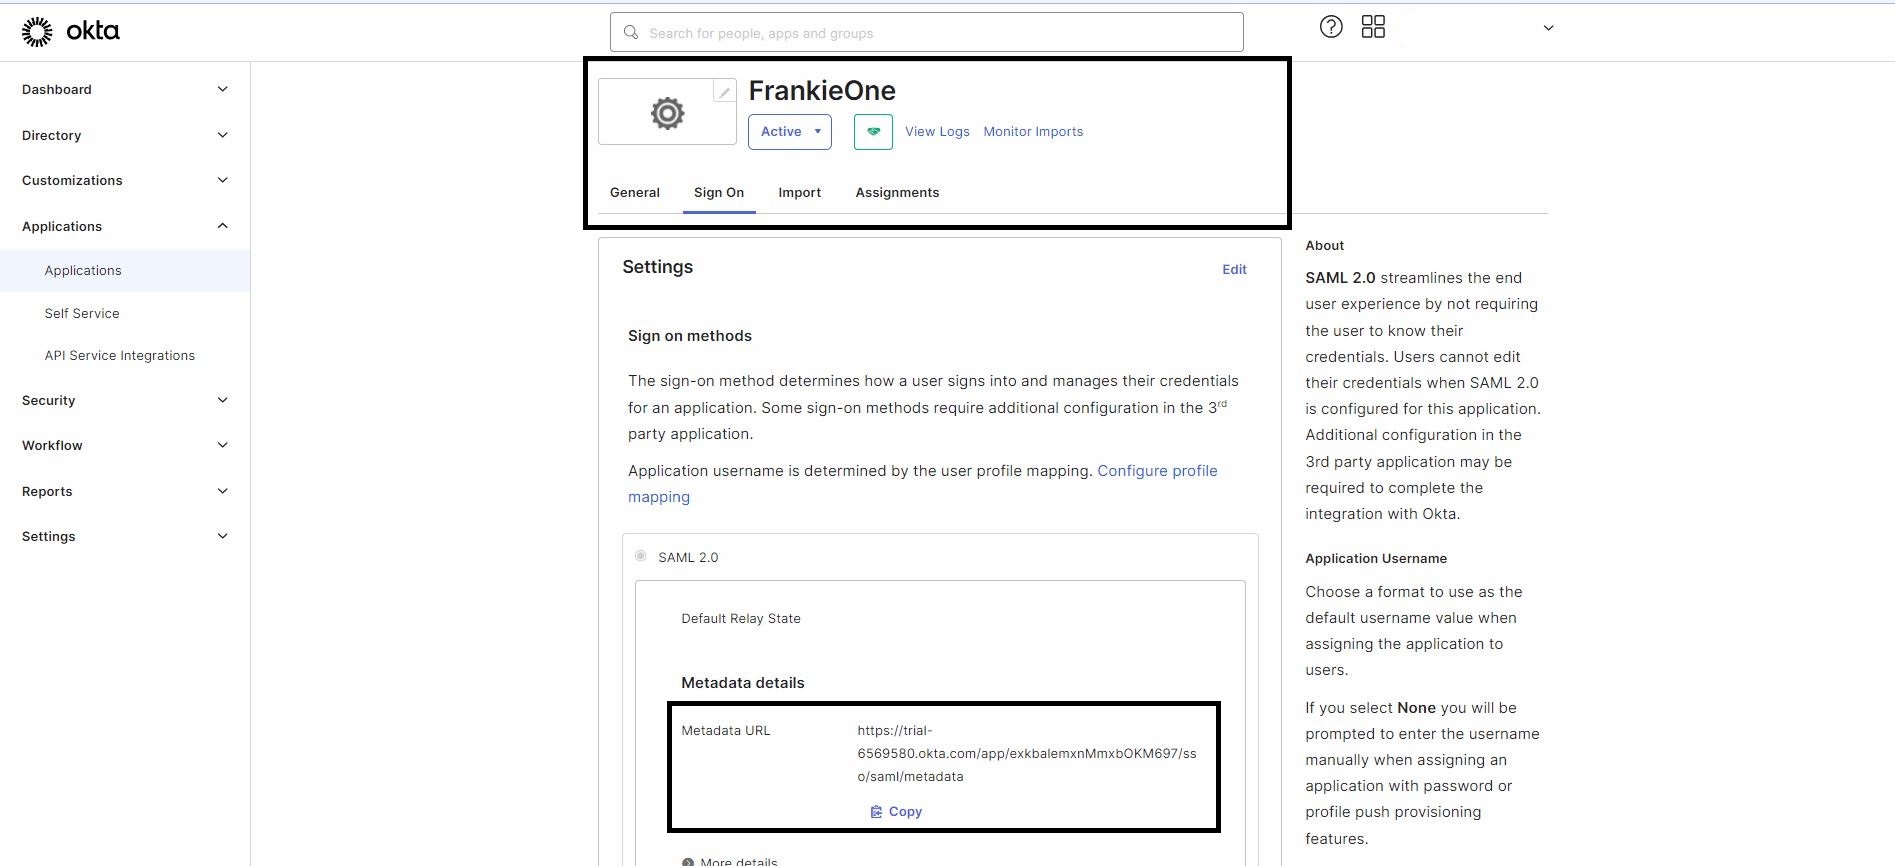
After creating the application, you'll see the application’s Sign On settings page, which includes the link to the metadata. Share this metadata with us (FrankieOne) to complete the SSO setup.
Notes
-
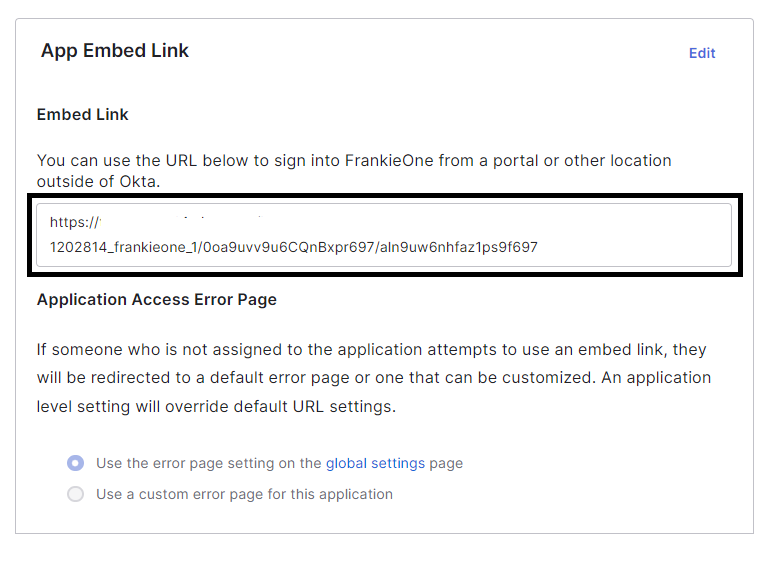
You can access the FrankieOne portal using the App Embed Link available under the General tab on the application’s home page.
-
If end users encounter permission errors from Okta, assign the respective users to this newly created application.
Updated 10 months ago