
Portal Navigation
Navigating the Portal
The FrankieOne Portal provides users with the visual interface for managing their account.

The default view of the Portal.
This navigation provides a simple and intuitive interface, giving the user the option to expand and collapse the sidebar as needed, to display information better.
By default, the navigation bar is expanded to show the full text of menu options. To collapse it, select the collapse button.
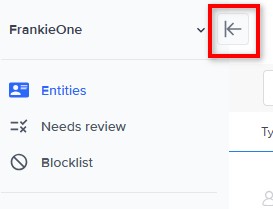
The collapse button.
To expand the navigation again, select the menu (burger) icon.
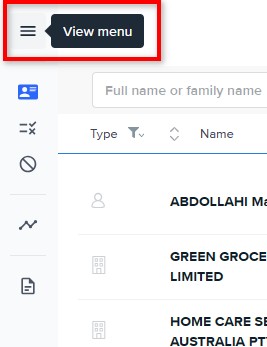
The menu icon.
The side bar contains links to the different pages of the Portal. As you select any of the links, the main content section will display the selected page.
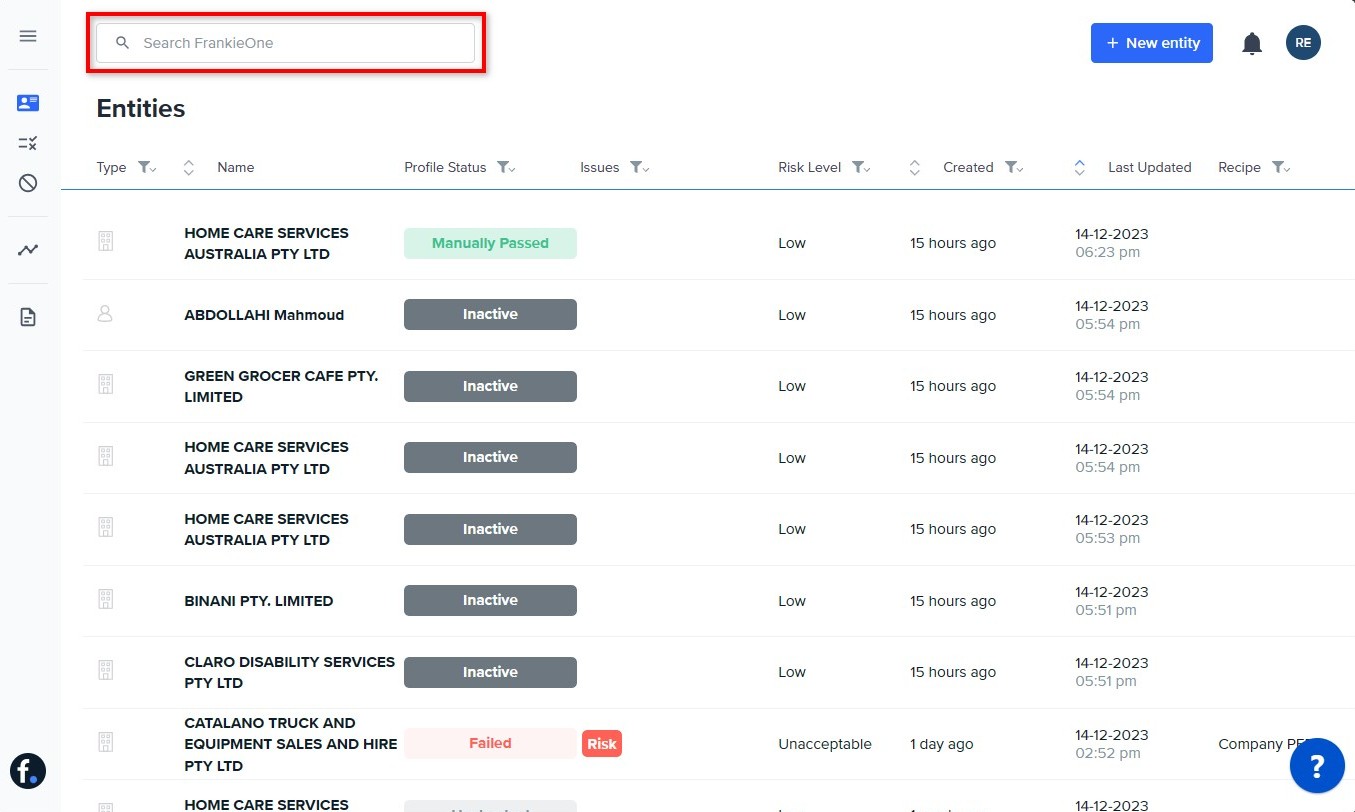
Entities
The Entities page contains a list of all profiles for that selected account. You can use the filters in each column to sort the lists. You can also use the search feature to find a profile within the list.

Search for profile by full name or family name, ID or registration.
Needs Review
The Needs Review page contains a list of all profiles that have not passed or needs to be manually reviewed to pass or fail checks. Similar to the Entities page, you can use the filters in each column to sort the lists. You can also use the search feature to find a profile within the list.
Blocklist
The Blocklist page display a list of all profiles that have been added to the blocklist, either automatically or manually. Learn more about blocklists here: https://apidocs.frankiefinancial.com/docs/blocklists. You can select and manage profiles on the blocklist.
Analytics
The Analytics page contains the Dashboard and System Monitoring tabs.
The Dashboard tab provides a quick overview of the metrics for user onboarding, provide critical business intelligence to operators and customers. Learn more about the Dashboard here: https://apidocs.frankiefinancial.com/docs/dashboard
The System Monitoring tab provides an up-to-date monitoring and status of the FrankieOne platform and its core systems, and different services.
Searching for entities
The FrankieOne Portal provides a convenient way to search for entities. A Search bar appears at the top of every page.
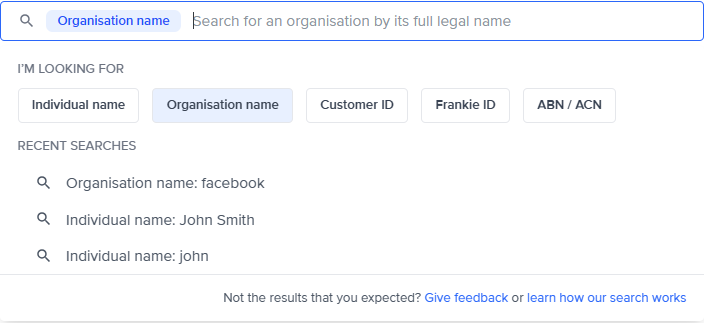
How to search
To search for an entity in the Portal:
- Click on the search field. The search bar will be expanded to show search options.
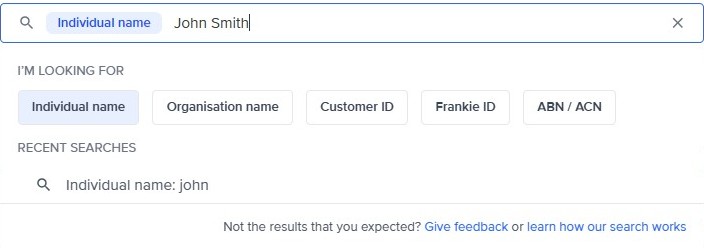
- Enter the search term.
- Select the type of entity identifier type, whether it's the Individual name, Organization name, Customer ID, Frankie ID, or ABN/ACN. By default, Individual name is selected.
- To perform the search using the information you entered, press Enter on your keyboard.
- You can repeat a previous search by selecting it from the Recent Searches.
- To perform a new search using a different search term, select the x icon, and enter your new search term.
If you log out, your last search term and search entity identifier type will be saved. Once you log in again, your last search term will be listed in the recent searches, with the last entity identifier type selected.
If several searches produce results that are not what you expect, you can select the Give feedback link to let us know how we can improve your search experience. You can also select the learn how our search works link to visit our public documentation page on global searches.
Search term character limits
The Maximum character length is 100 & the minimum is 1.
If you perform a search for an entity using a search term that is too long or too short, no search results will be displayed.
Filtering entities
You can also filter the entities displayed in the entities table using the filtering options available under the search bar.
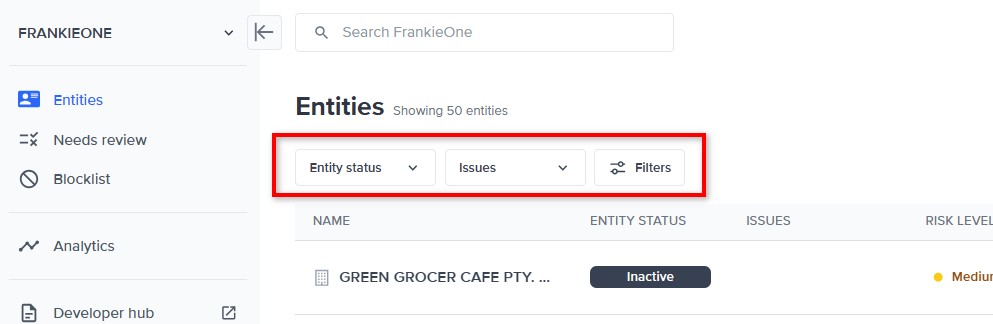
Filtering options for entities.
Filter by entity status
Use the Entity status dropdown menu to select the status types of the entities to display.
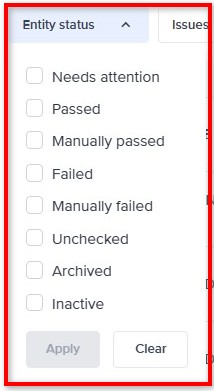
Entity status dropdown menu.
Once you've selected the status types to display, select Apply. Select Clear to unselect all the status type.
Filter by issue type
Use the Issues dropdown menu to select the issue types of the entities to display.
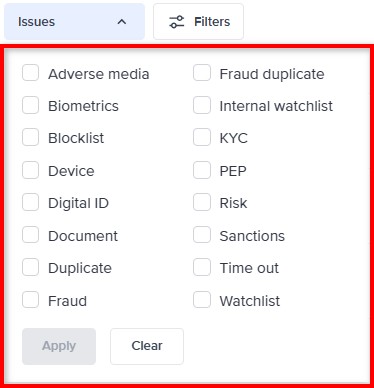
Issues status dropdown menu.
Once you've selected the issue types to display, select Apply. Select Clear to unselect all the issue types.
Filters overview modal
Select the Filters button to open the Filters modal. Using the Filters modal, you can view all the possible filters that can be applied to the entities displayed in the entities table.
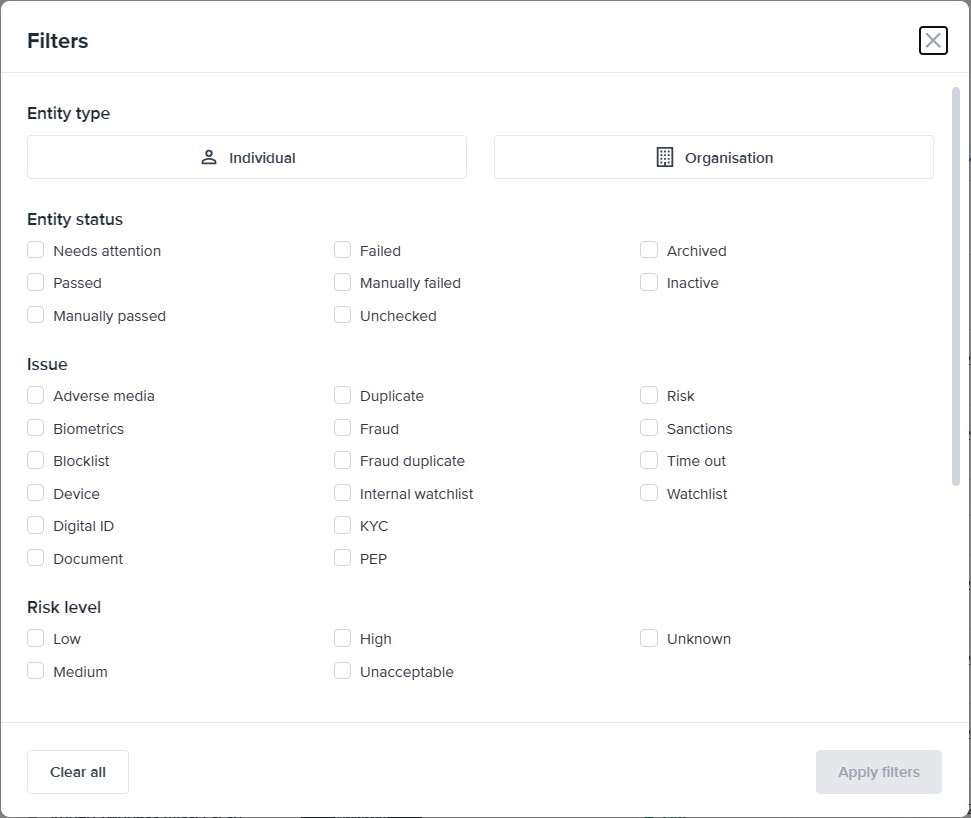
The filters you can select are categorized according to the following:
- Entity type
- Entity status
- Issue
- Risk level
- Created date
- Recipe
- Assignee
Select the filter criteria you prefer, and then select Apply filters to enable those filters. To start over, select the Clear all button to remove your selection.
Sorting entities
To sort the entities displayed in the entities table, select the sorting icons (up and down arrows) beside the CREATED and UPDATED column headers. The direction of sorting (descending or ascending) is highlighted by a single blue arrow:
- Single blue up arrow means the entities are displayed in ascending order.
- Single blue down arrow means the entities are displayed in descending order.

Updated about 1 month ago