Migrating from v2 to v3
Learn how to migrate from v2 to v3, if you are currently using v2.
If you currently are using v2 of the SmartUI, you will need to first migrate from v2 to v3, and then from v3 to v4.
This page explains how to migrate from v2 to v3. Once complete, please see: Migrating from v3 to v4
Smart UI v3 introduces two breaking changes in relation to v2: Scoped styles and Id Scan Validation opt-in.
This guide will show you how to migrate an existing project using v2 to v3.
Initializing the Smart UI
The v2 version allowed you to initialize the Smart UI by passing the width, height, and ffToken as properties to the <ff-onboarding-widget> in the HTML. That way of initializing has been removed in v3.
Please use the recommended way documented in Getting Started -> Initialise-Smart-UI-in-the-frontend
Id Scan Validation opt-in
- This breaking change only affects users of the Smart UI with Id scan verification.
Currently in v2, if you use Onfido to verify document scans, there are three ways to configure it:
- you may omit the configuration idScanVerification;
- you may also include it with the value true;
- you may include it by passing an object with extra configurations. (See Smart UI Configuraton for more details)
To migrate to v3, you only need to make changes if you omit the configuration (option 1). In that case, explicitly give it the value true and everything will behave the same.
Scoped styles
- This breaking change only affects users of the Smart UI with custom styles
- Also note: you may have been customizing the Smart UI without even realizing it. Your website's styles might have unintentionally leaked and affected the Smart UI (which this new release prevents from happening). If that happened in any way, it doesn't disrupt your UI, it was not an issue.
With this upgrade, the UI will then change to our default styles, as we planned it. Please review the appearance of the Smart UI after upgrading.
To prevent unexpected styles from leaking from the website to the Smart UI, custom styles are now completely encapsulated with a Shadow DOM wrapper. For that reason, any custom CSS needs to be passed as a string (ES6 Template Literal recommended) to the new configuration field injectedCss.
-
In case your styles are inserted as embedded style tags in the head of the document, which could make it difficult to pass styles as a string to the configuration, you may instead assign an
idto that style tag and pass theidto another configuration field, called injectedCssTagID. Don't include "#" with the id name. -
If even embedded styles in <style> tags don't fit your build cycle, your CSS is most likely built into external files and inserted at runtime time using <link> tags. The same configuration field may be used with <link> tags, by simply assigning an id to the tag and passing it to injectedCssTagID.
The widget will understand it's a link to an external file and use its contents.
This won't work if the file is hosted in a different domain due to CORS protection.
When Using Embedded Stylesheets
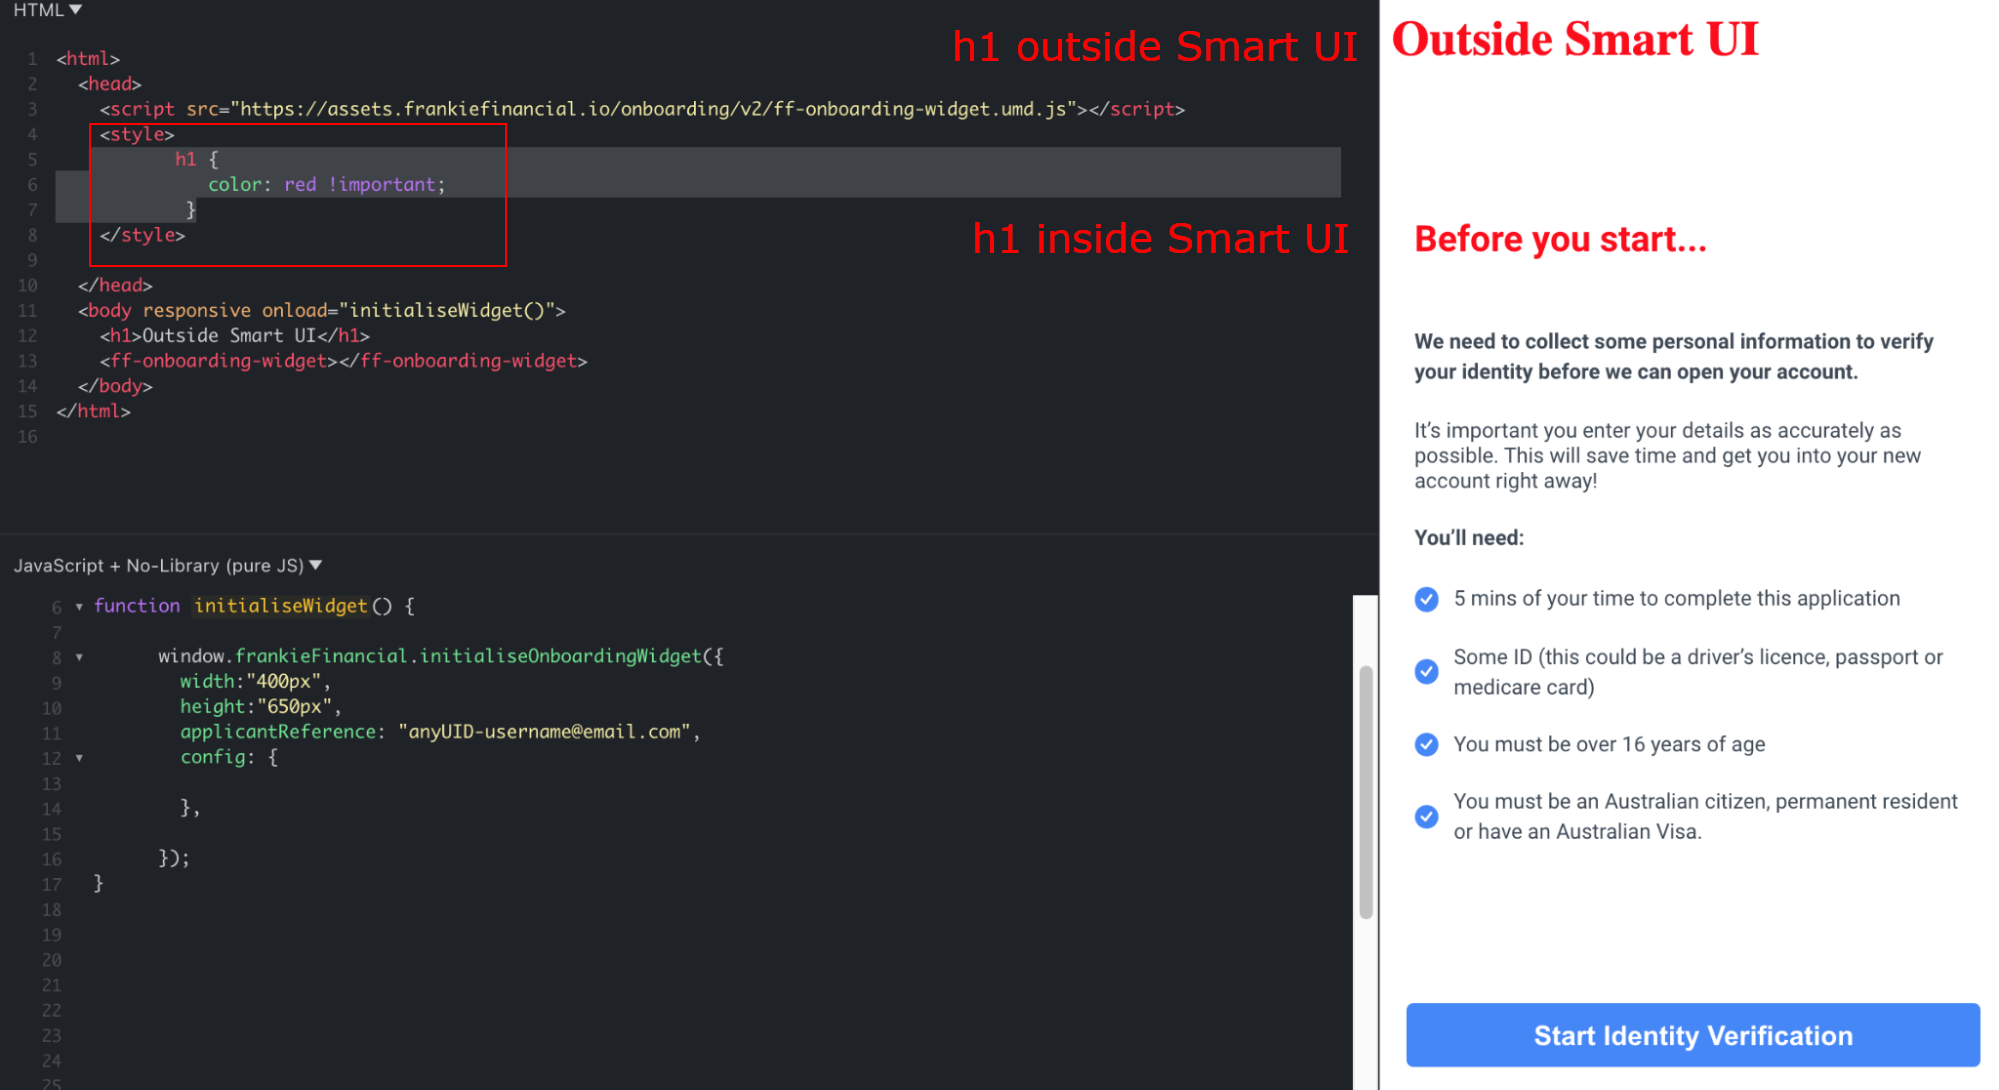
On v2, it's possible to style the Smart UI by using embedded styles, with a
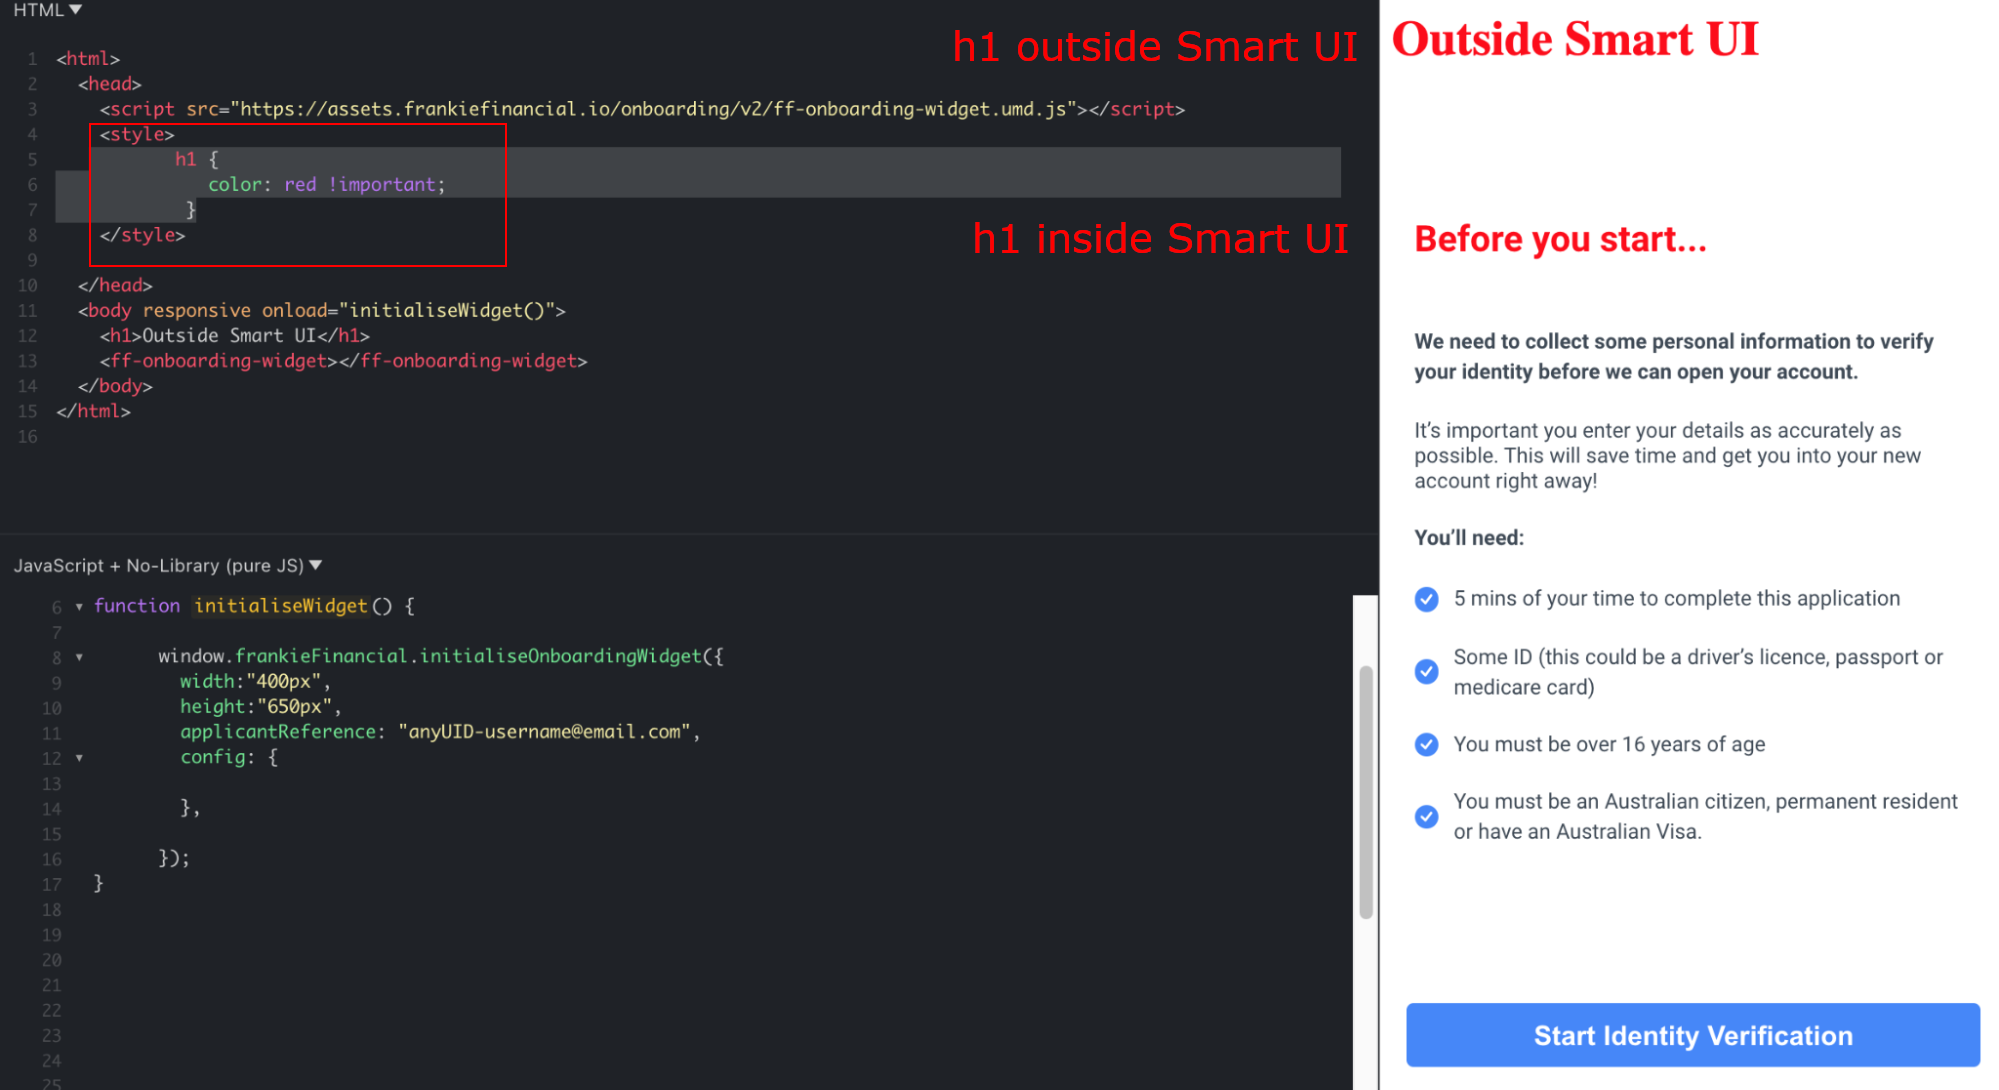
On v3, the same setup would only affect the host website, but not the Smart UI.
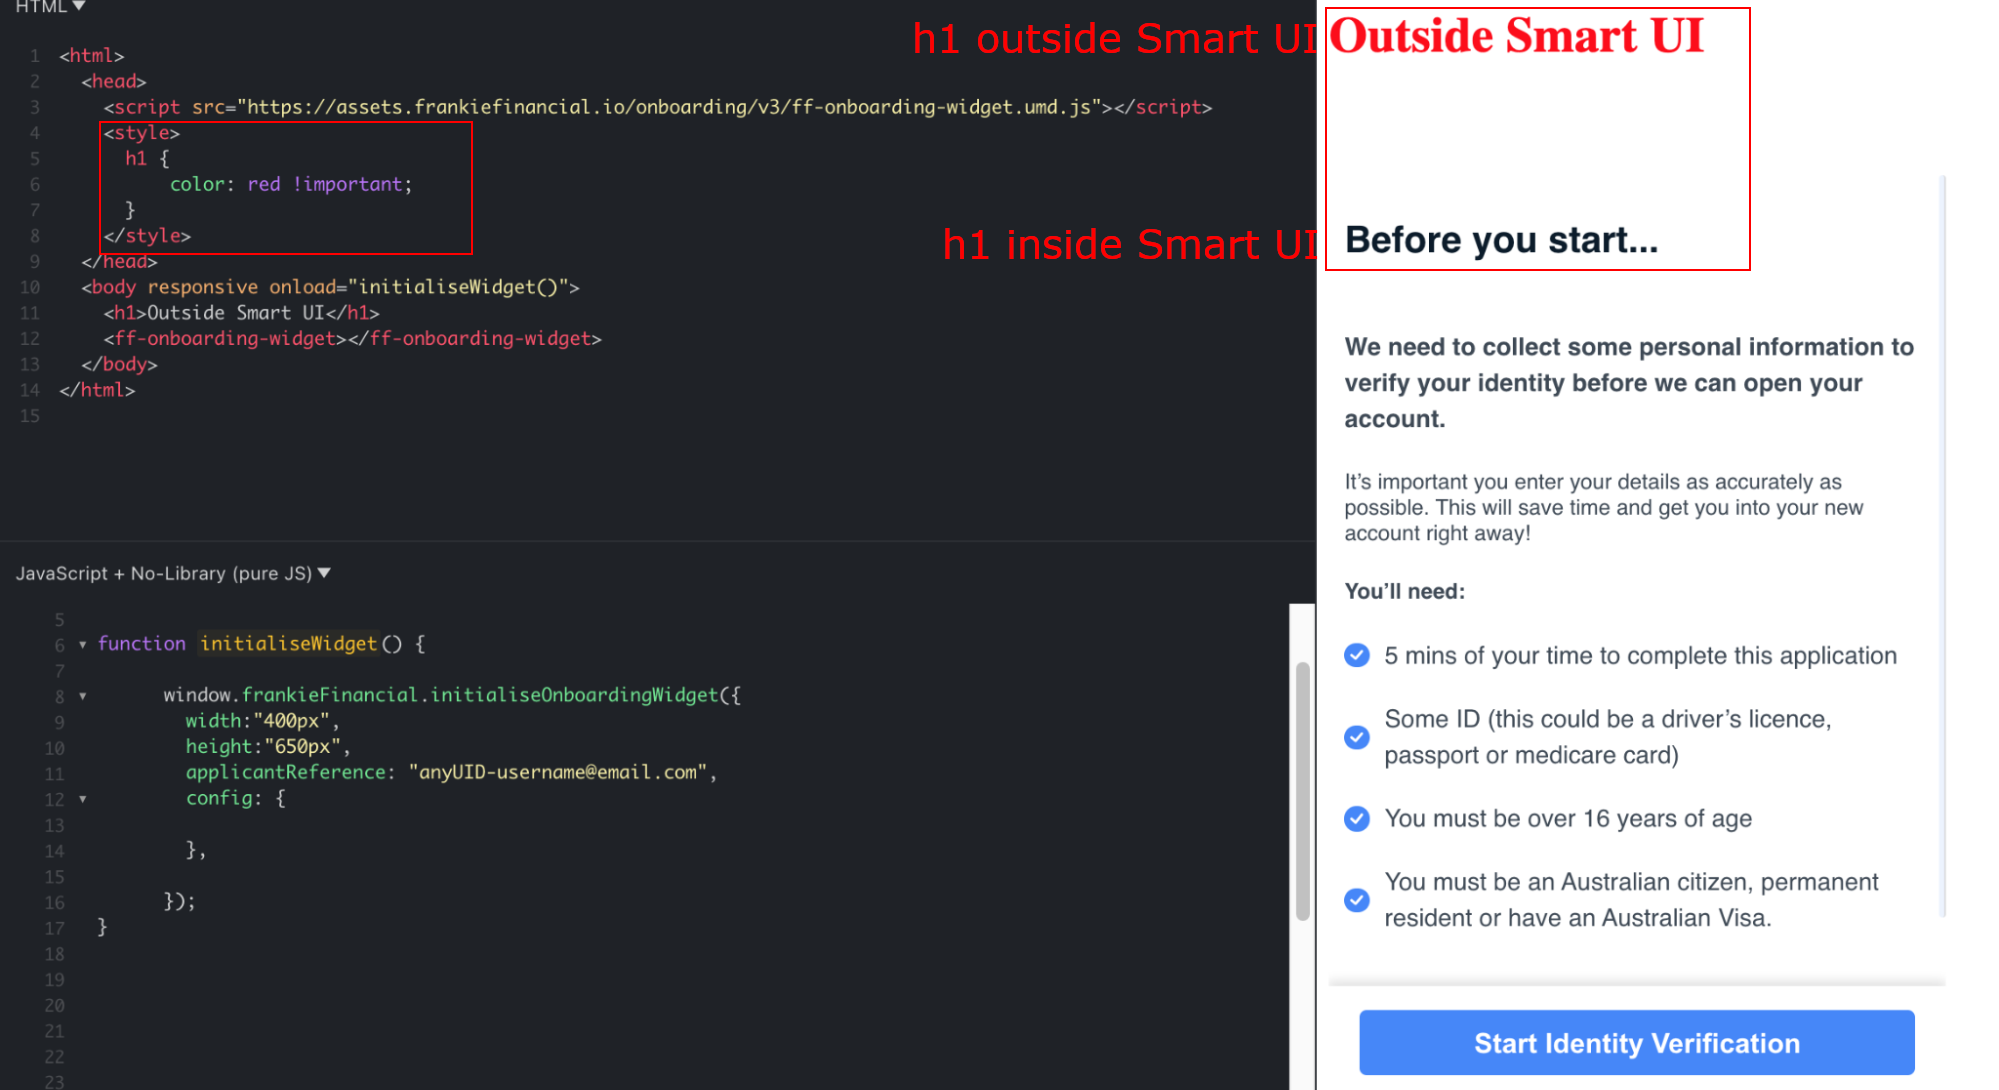
To get the same behavior as on v2, you can simply assign an ID to the style tag and pass that ID to the new configuration field injectedCssTagID. The initializer will take care of injecting that CSS.
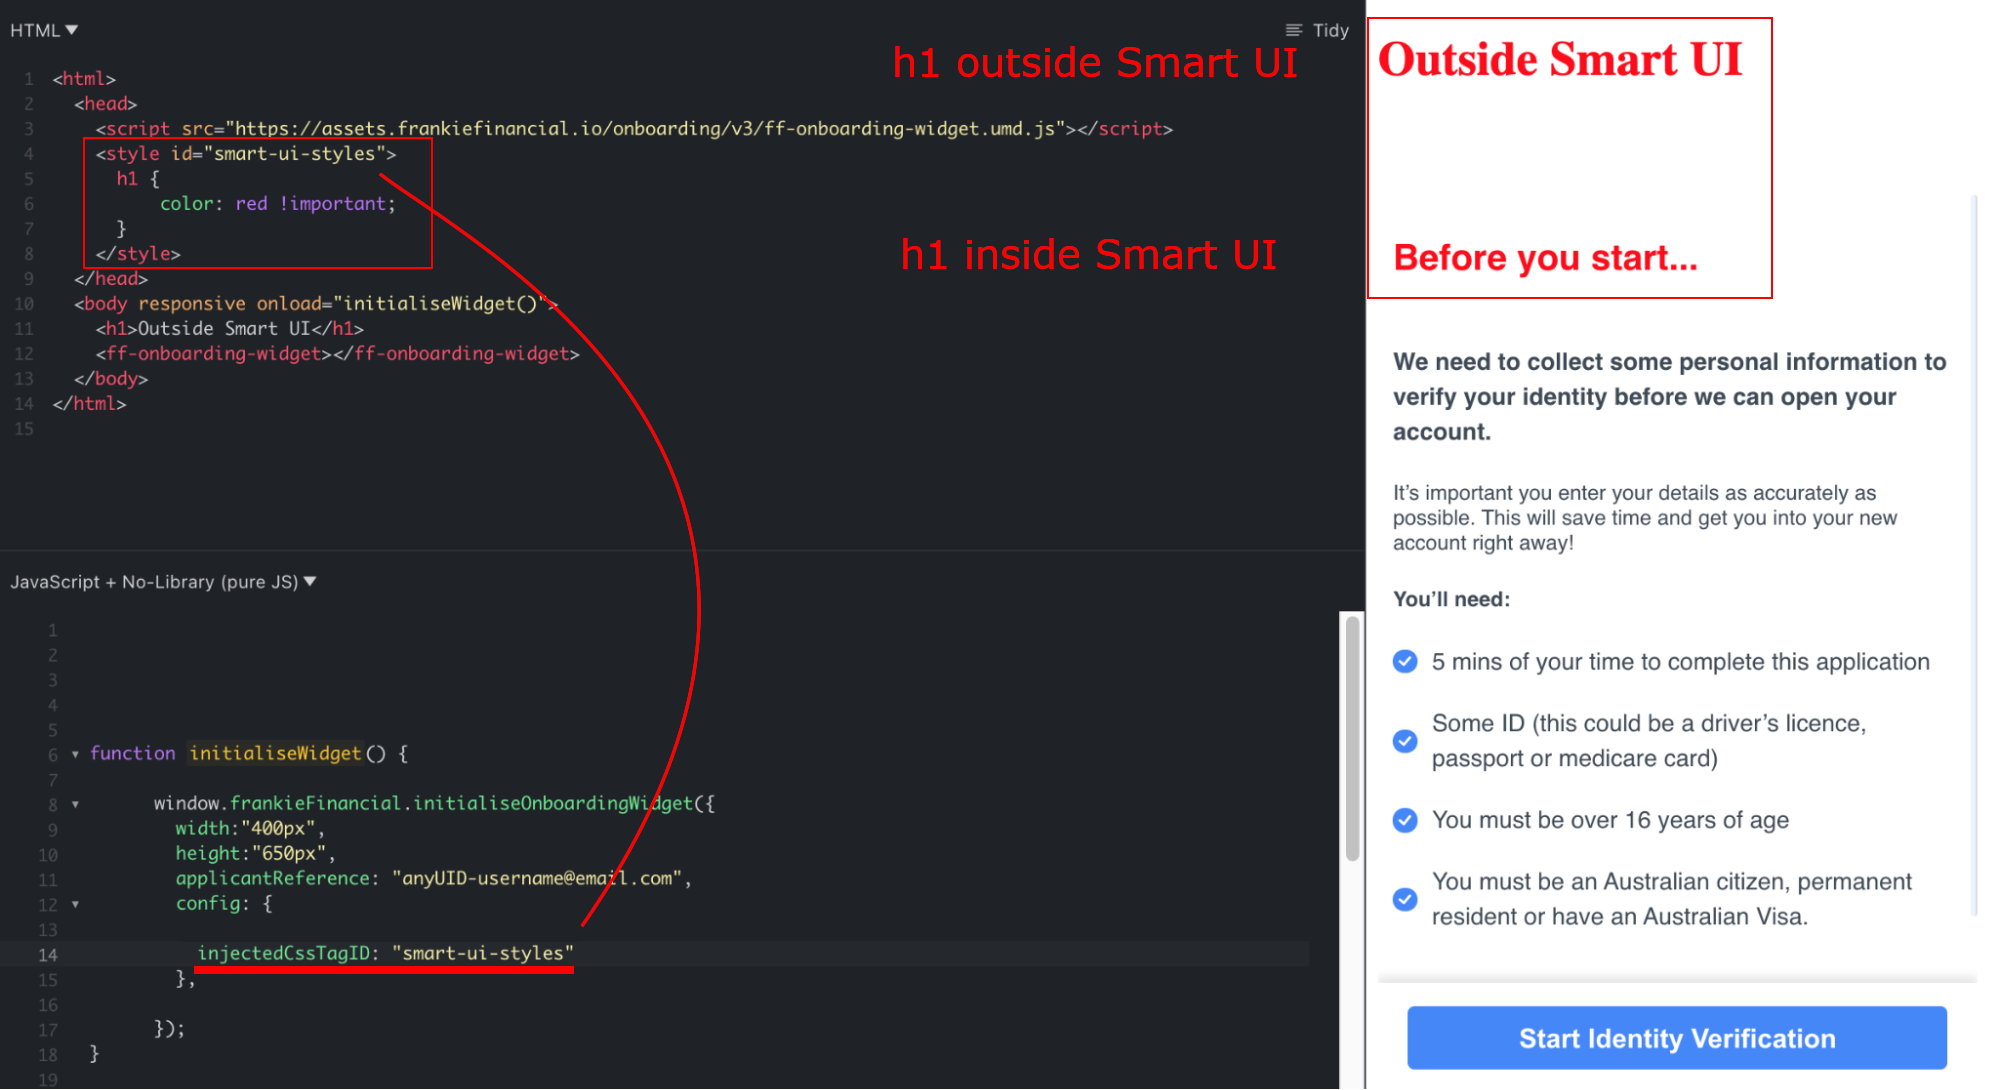
Optional: Note that to prevent that stylesheet from affecting the rest of the website, you need to constrain the style tag with media="max-width:1px"
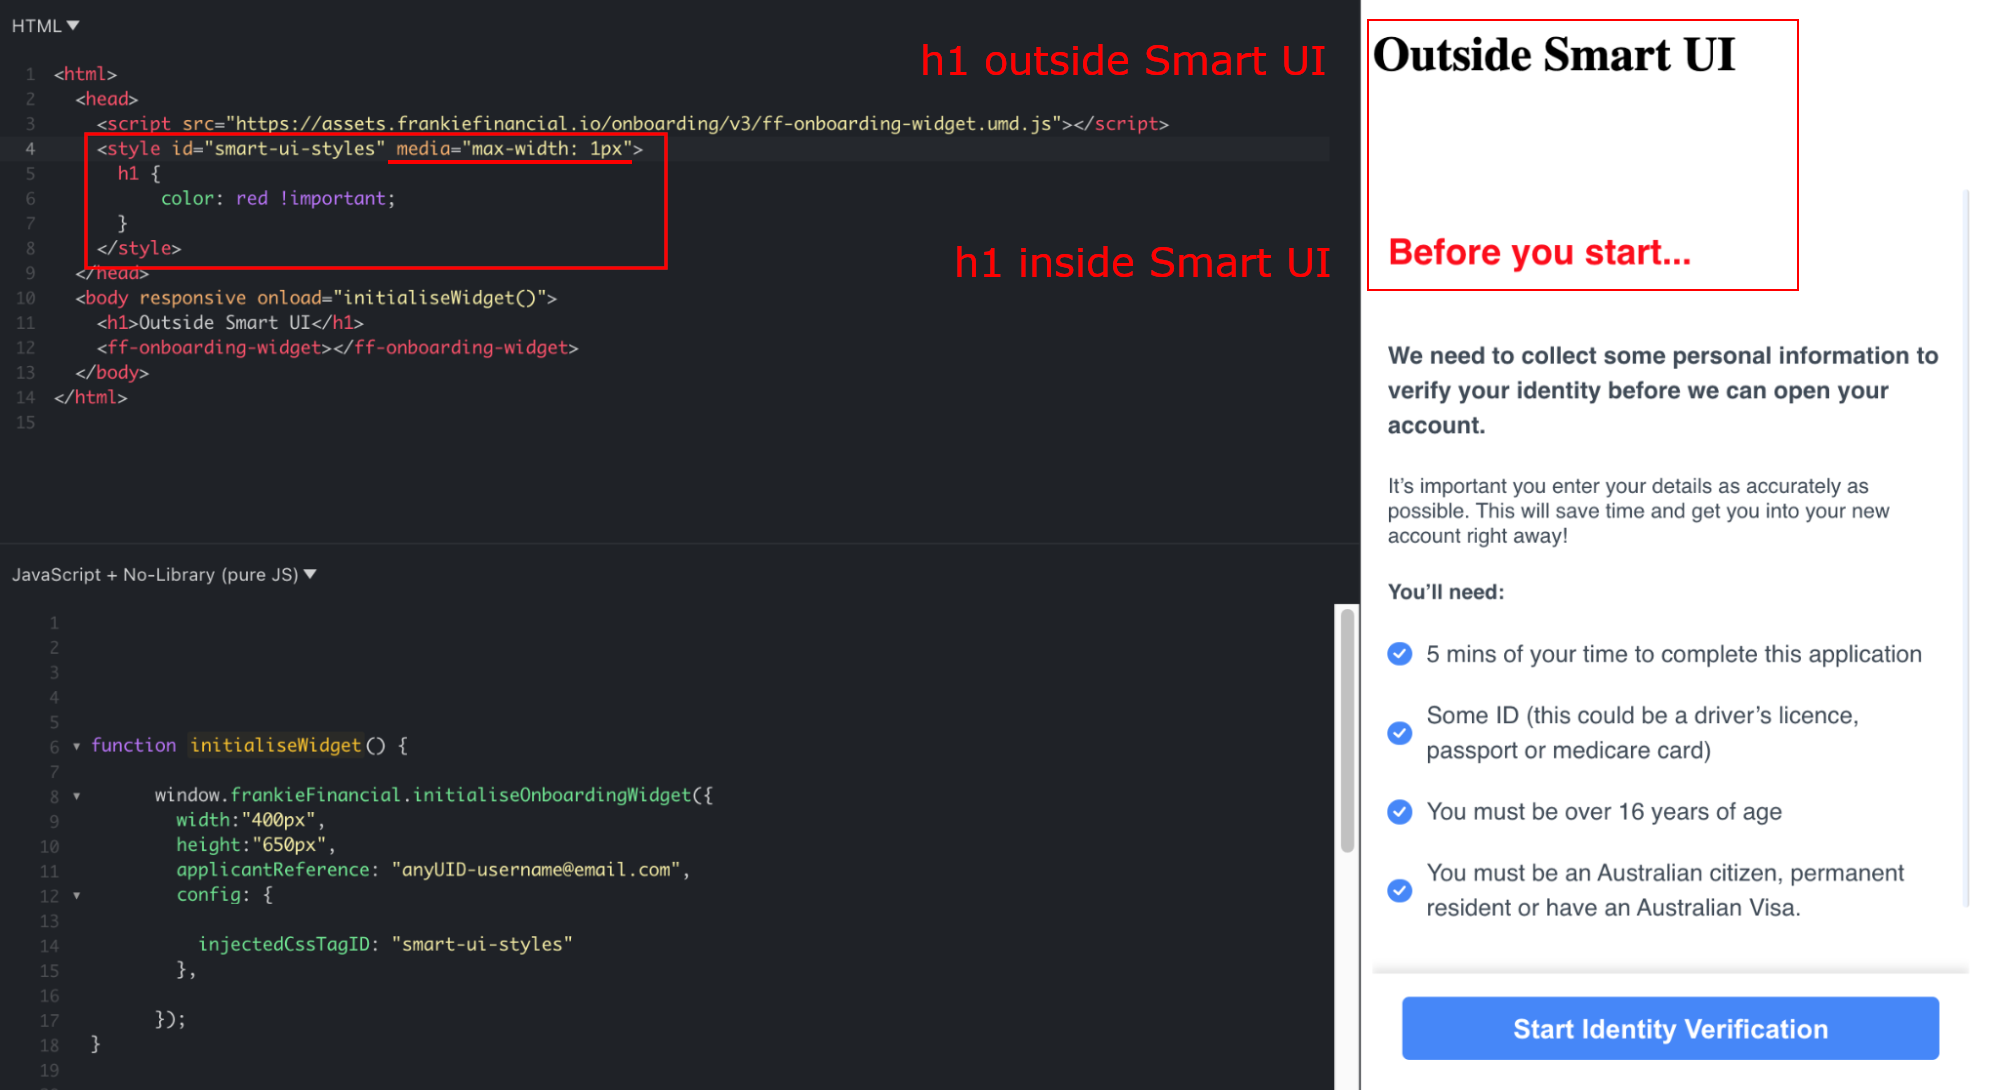
On v2 it's possible to style the Smart UI with external stylesheets included with a tag. Styles included this way are available throughout the whole website. This behaves the same as when using embedded styles and affects both Smart UI and the host website.
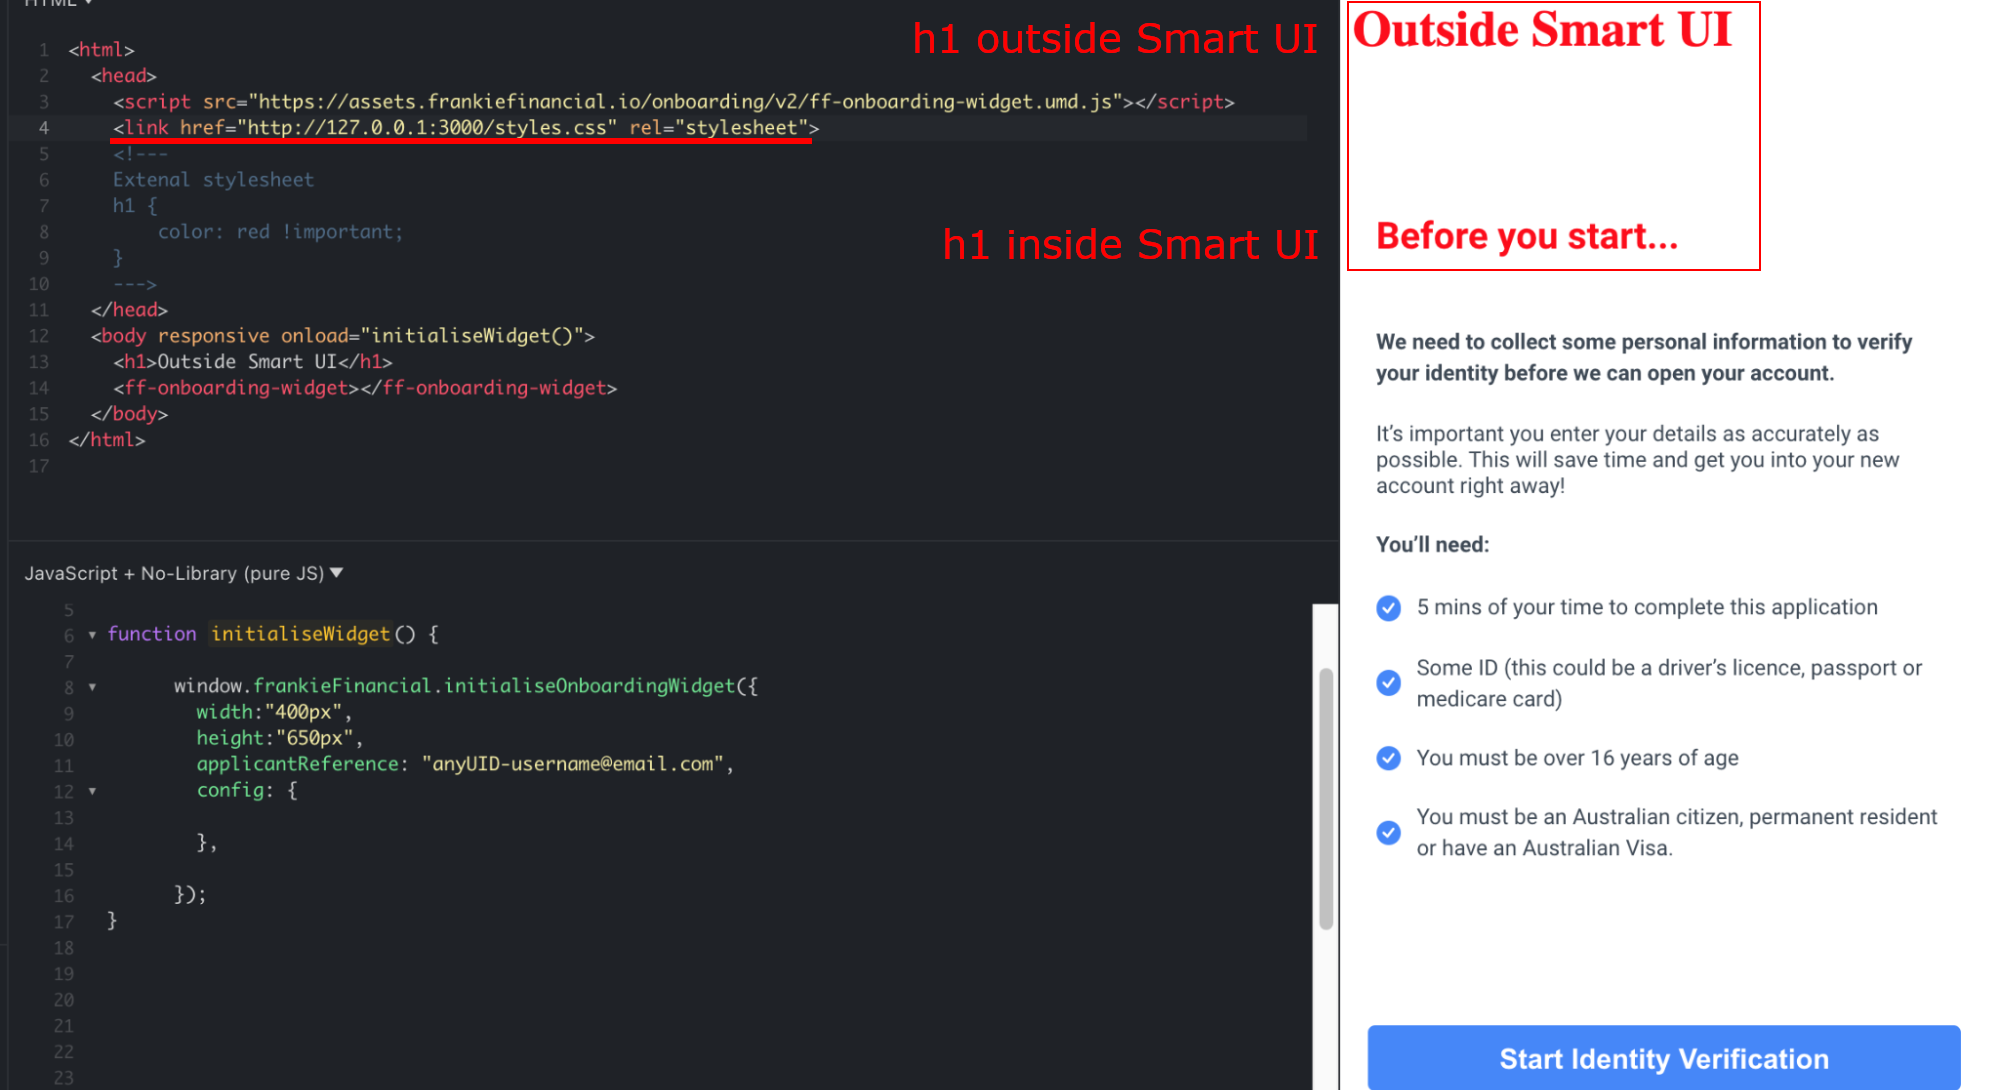
On v3, the same setup would only affect the host website, but not the Smart UI.
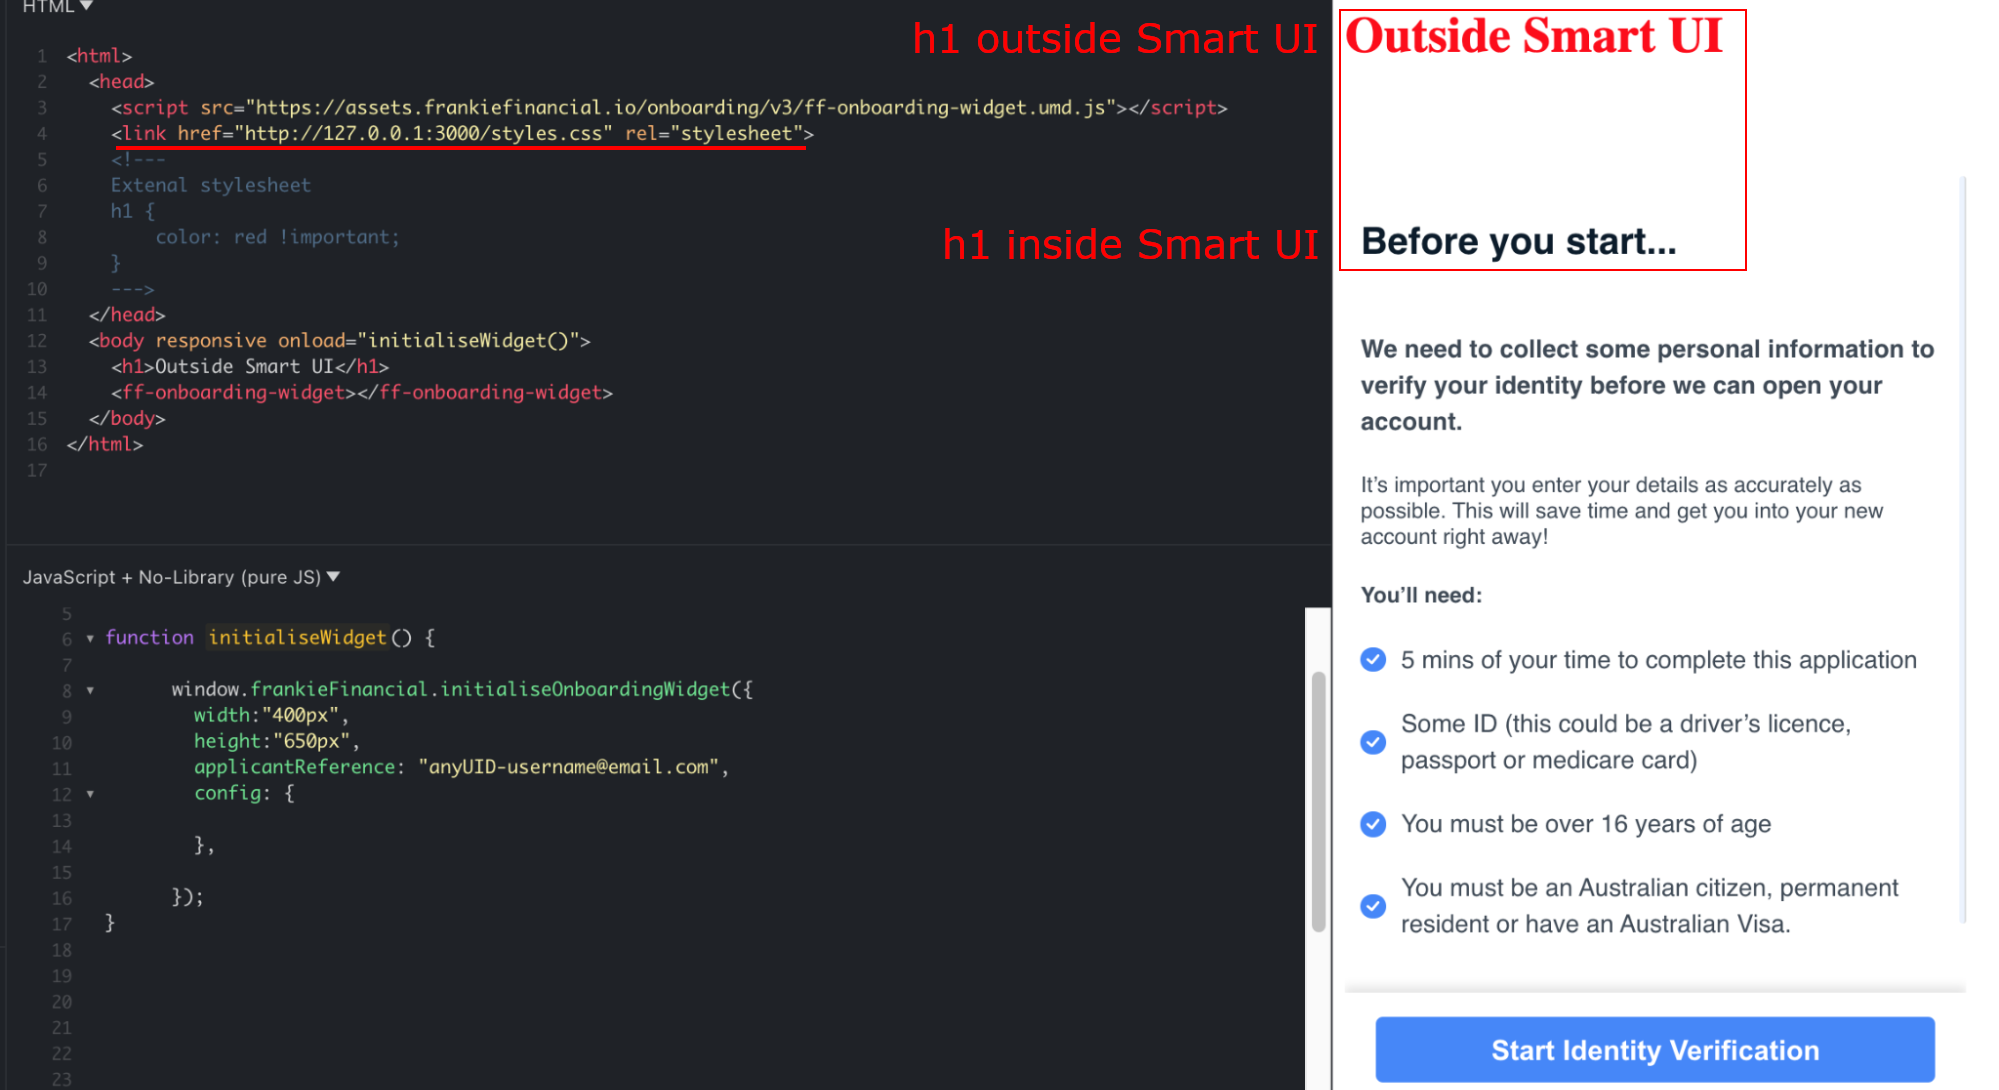
To get the same behaviour as on v2, you can simply assign an ID to the link tag and pass that ID to the new configuration field injectedCssTagID. The initialiser will take care of injecting that css.
Attention
To increase security and prevent issues with XSS, the browser might prevent importing an external stylesheet file hosted on a different domain to the one hosting the smart ui. In such cases the stylesheet will be invisible to the Smart UI and the message "FrankieOne: Style tag {tag id} wasn't found in document." will be logged to the browser's console. Please let us know if this prevents your styles from working.
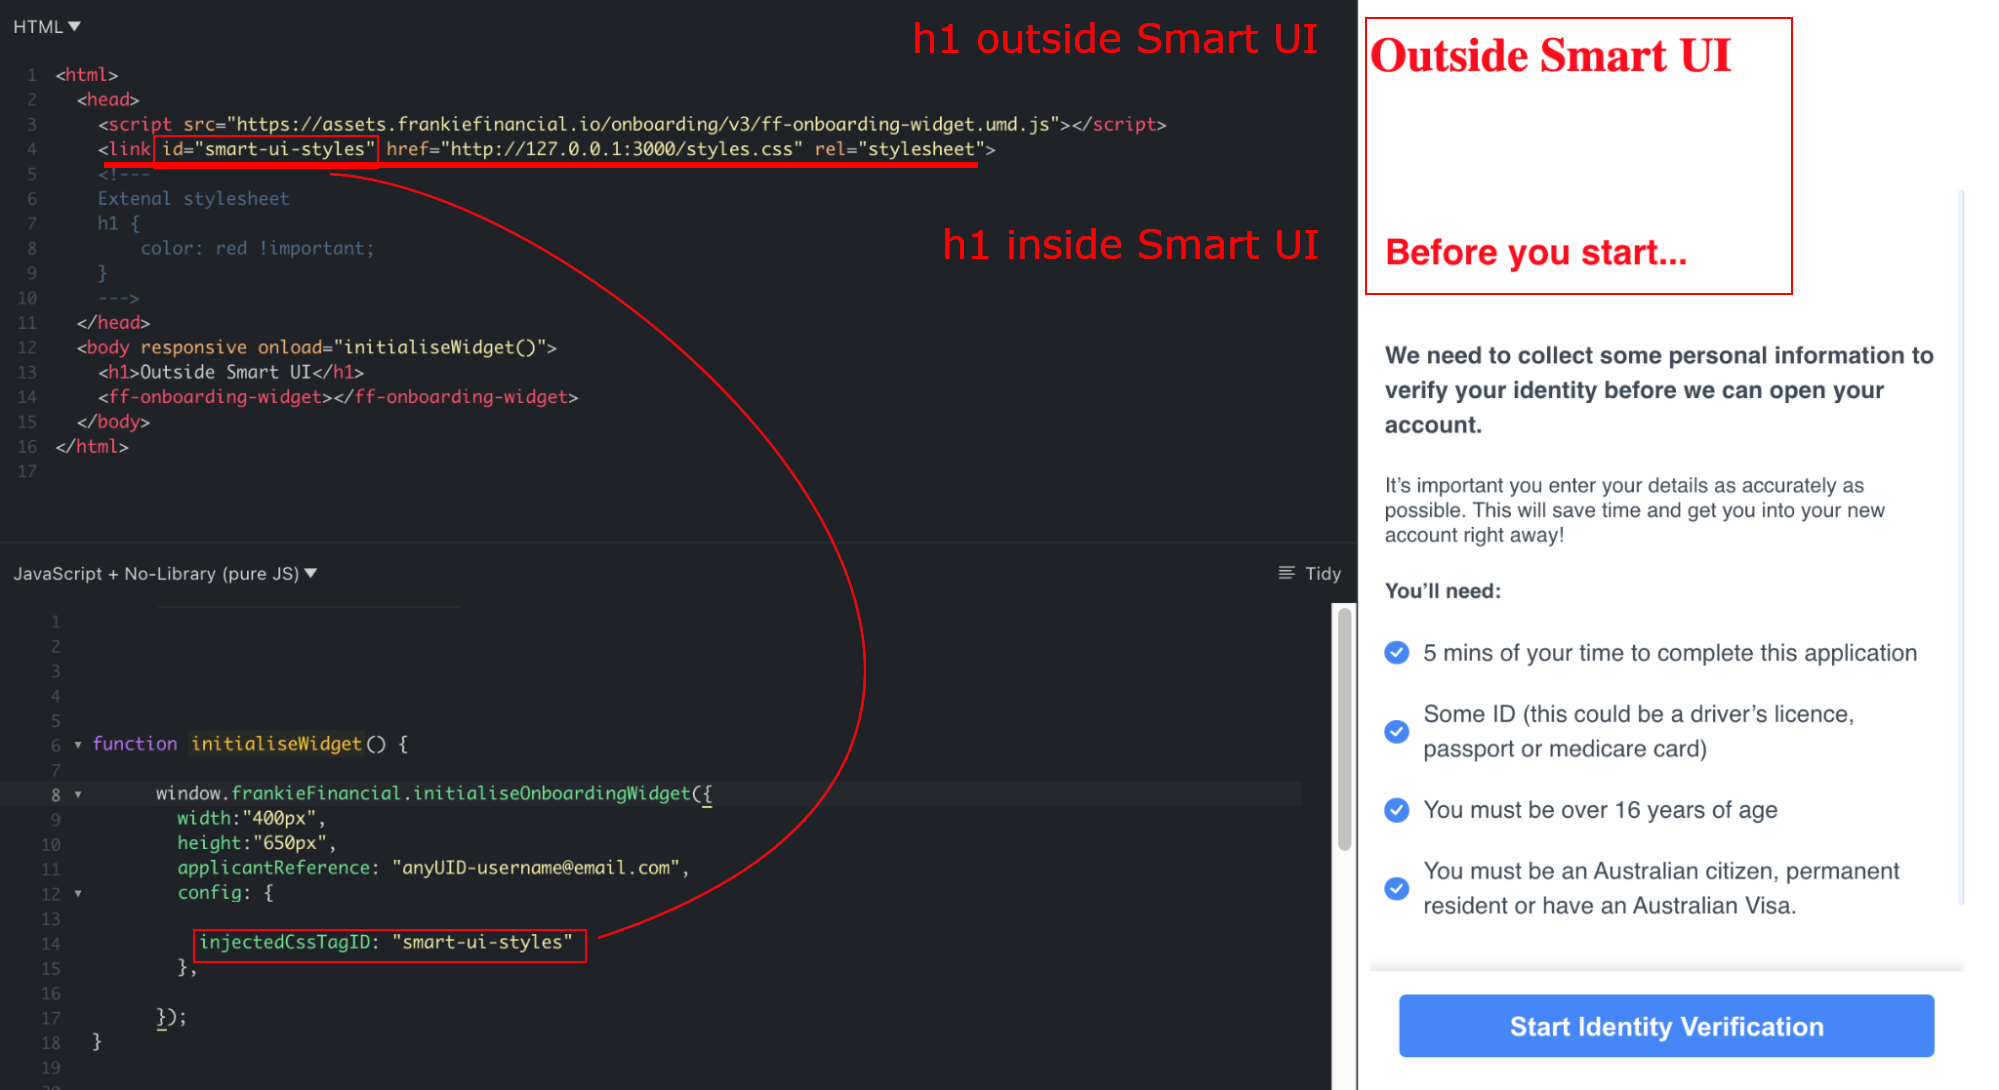
Optional
Note that to prevent that stylesheet from affecting the rest of the website, you need to constrain it with media="max-width:1px"
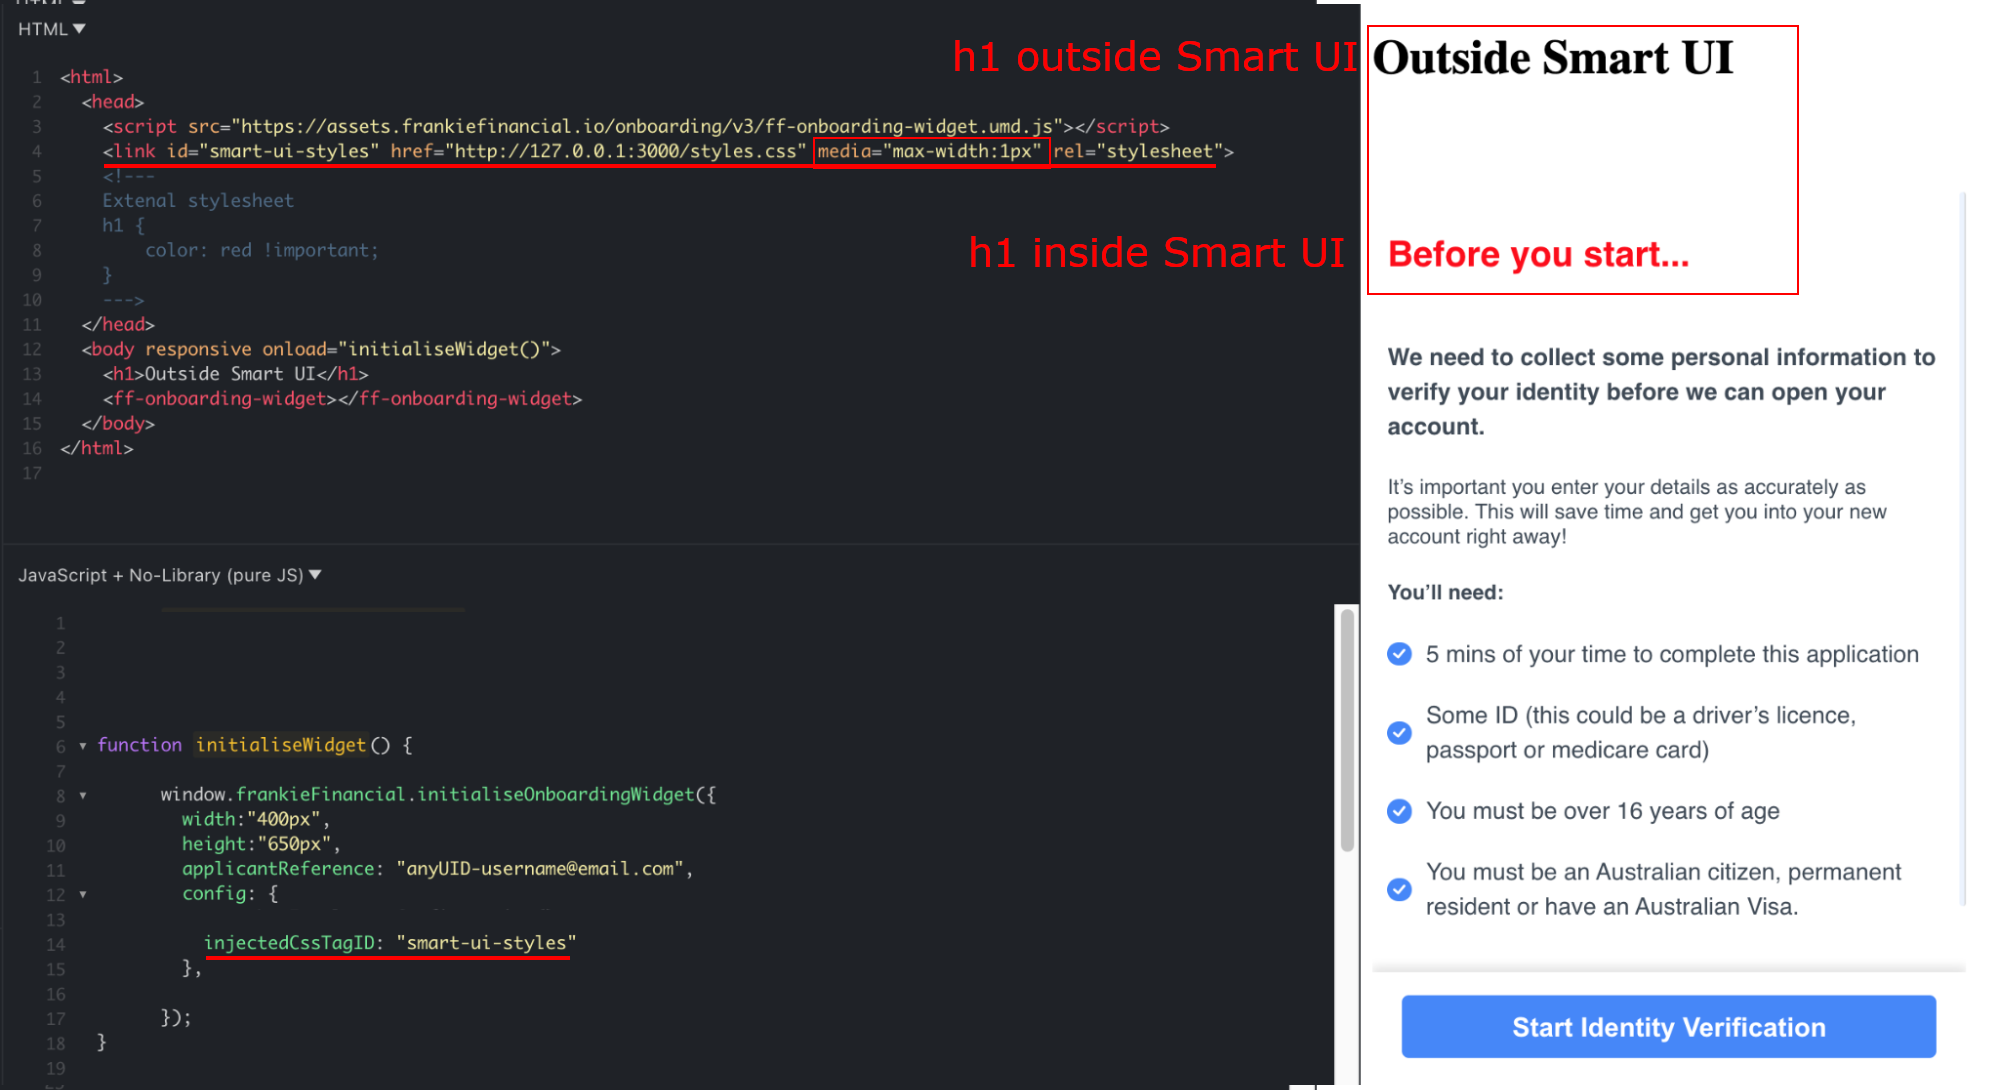
Manual CSS
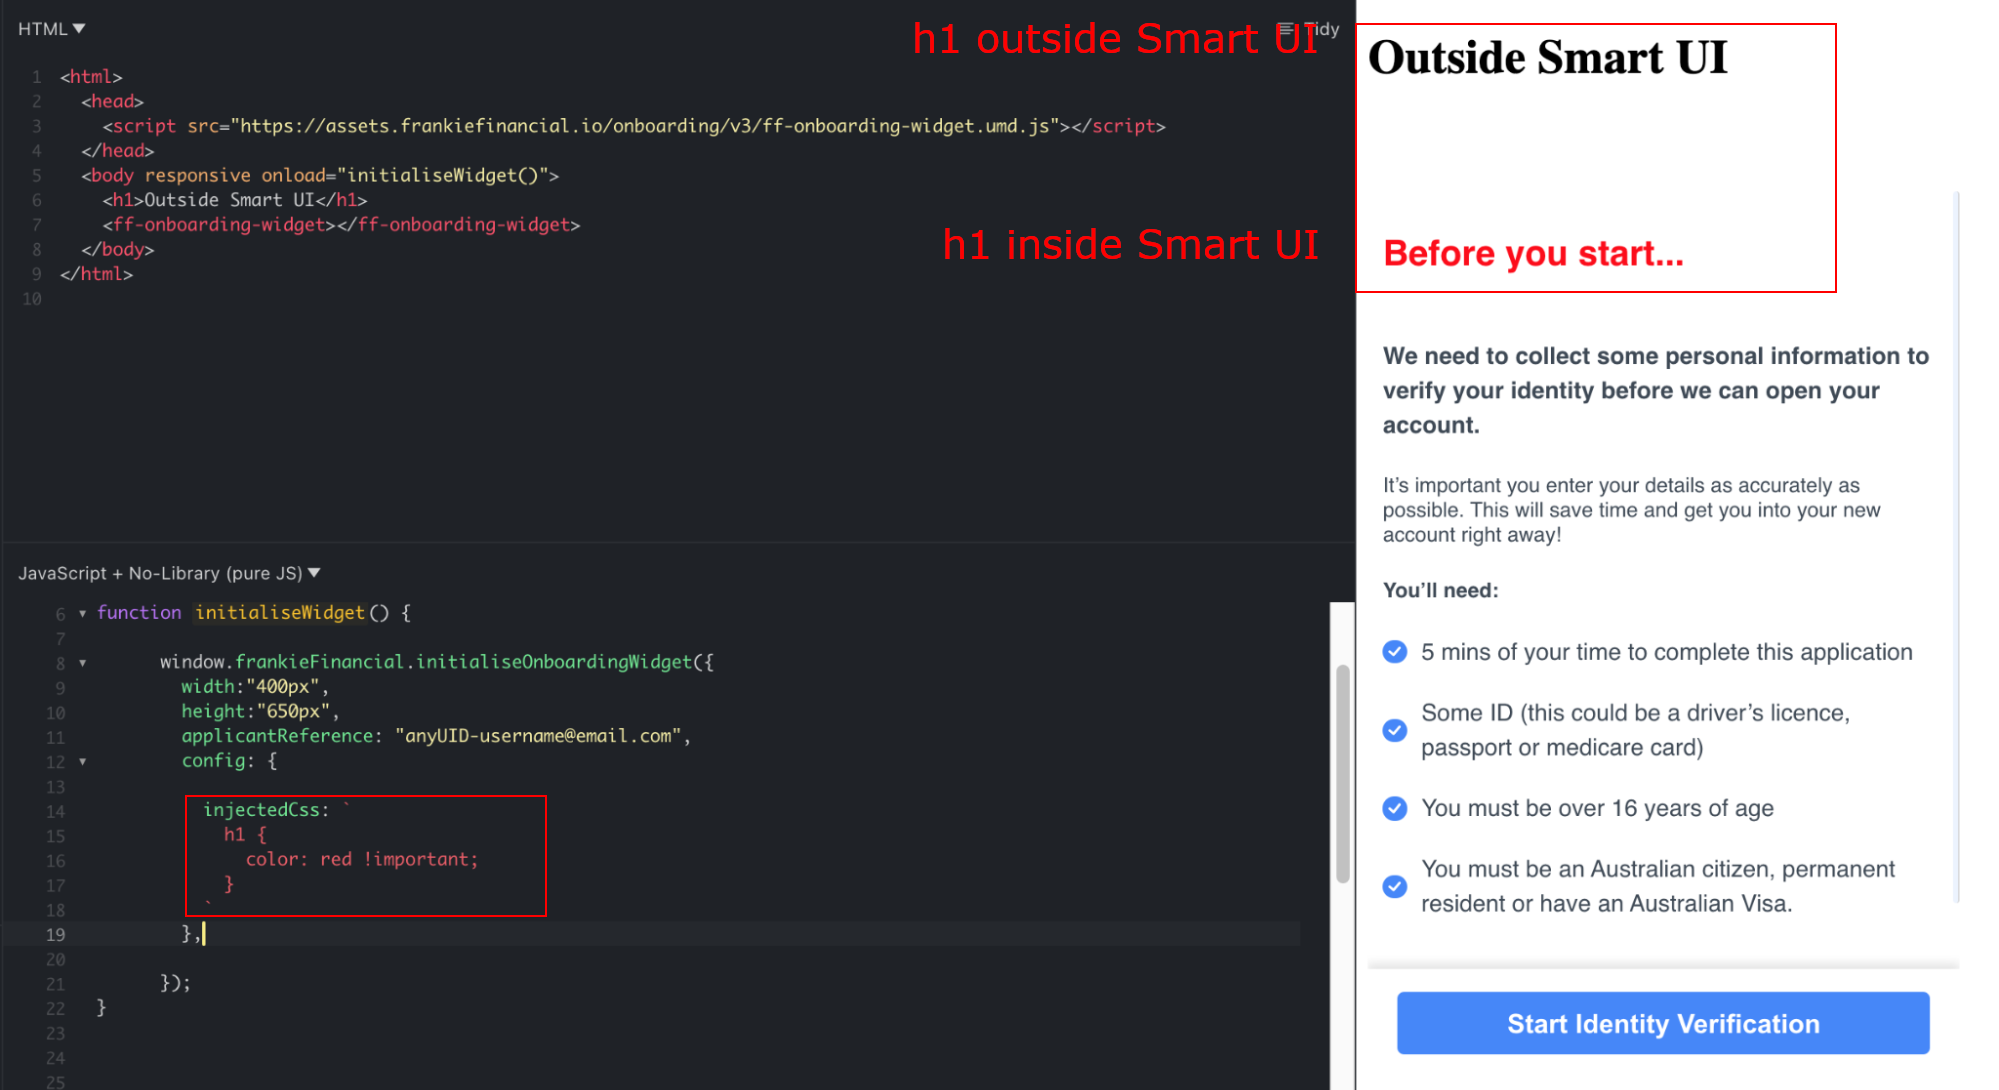
Depending on your setup, the most straightforward way to migrate global styles to scoped styles might be to simply move them from the embedded style tag or external CSS file to the new configuration field injectedCss.
Assuming you isolated those styles from the rest of the host website by prefixing each selector with #ff-onboarding-widget, you may simply move them with no impact on the external website. Otherwise, in case the styles are shared, it's recommended to use one of the options above.
Note your string will need to use ES6's Template Literals (`).
Manually moving the same styles to configuration object on v3.
Updated about 1 year ago
