
Using Hosted OneSDK
Introduction
Our goal is to simplify integration for our customers. Using our self-hosted onboarding URL via OneSDK, you can seamlessly connect with FrankieOne services with little or no code required. It’s all about making the switch easy and the connection effortless.
Hosted OneSDK provides an easy low-code integration for our customers to seamlessly connect to FrankieOne services.

Hosted OneSDK also allow customers to receive updates automatically without them having to touch the code. By having a consistent and controlled experience on the FrankieOne side we have ensured the integration is ‘best practice’ and meets the security standards, and thus better compliance and data protection, which reduces a lot of engineering and security overheads from customers aiming to go live as soon as possible.
✅ Benefits
The FrankieOne Hosted OneSDK solution provides enterprise clients:
-
one API integration for both Web and Mobile applications with all the IDV vendors are covered in the same API
-
an onboarding URL that is hosted and managed by FrankieOne.
-
the ability to send the URL via SMS or easily open it within mobile and web applications via iFrame or WebView
-
have the Send Biometrics link in Portal, which is also available for individual and UBO/Associated entities in Portal
-
the benefit of FrankieOne handling the URL without the customer having to install OneSDK on their side. If a new beta feature is released, it can be automatically enabled, or optionally choose to use the most stable version.
-
a seamless, low-code integration for faster development and market entry.
-
a significant improvement on the end-user onboarding experience, reducing the time spent to addressing issues and re-initiating processes by having the ability to send onboarding link via the FrankieOne Portal, as needed.
Integration
Integrating FrankieOne Hosted OneSDK is as simple as you generating an onboarding URL to use within your native mobile and web application to onboard your end users.
Step 1. Generating URL the Onboarding API
To generate the URL, send a request to our Onboarding API, https://{baseURL}/idv/v2/idvalidate/onboarding-url with the following parameters:
Header parameter sample
curl --location '{baseURL}/idv/v2/idvalidate/onboarding-url' \
--header 'X-Frankie-Customerid: xxxxxxxx-xxxx-xxxx-xxxx-xxxxxxxxxxxx' \
--header 'api_key: xxxxxxxxxxxxxxxxxxxxxxxxxxxxxxxxxxxxxxxxxxxxxxxxxxxxxxxxxxxxxxxx' \
--header 'Content-Type: application/json' \
Sample Request - New customer reference
{
    "applicationRef": "<UNIQUE_APPLICATION_REF>",
    "customerRef": "<UNIQUE_REFERENCE>",
    "consent": true,
    "phoneNumber": "04xxxxxxxx",
    "phoneCode": "+61",
    "recipientName": "TEST",
    "sendSMS": true
}
Sample Request - Existing entityId
{
    "consent": true,
    "phoneNumber": "04xxxxxxxx",
    "phoneCode": "+61",
    "sendSMS": true
    "entity": {
        "entityId": "",
        "addresses": [
            {
                "country": "AUS"
            }
        ],
        "extraData": [
            {
                "kvpKey": "application_reference",
                "kvpType": "id.external",
                "kvpValue": "<UNIQUE_APPLICATION_REF>"
            },
            {
                "kvpKey": "customer_reference",
                "kvpType": "id.external",
                "kvpValue": "<UNIQUE_REFERENCE>"
            }
        ],
        "name": {
            "displayName": "",
            "familyName": "Test",
            "givenName": "Test",
            "honourific": "",
            "middleName": ""
        }
    }
}
Sending the Onboarding URL through SMS
To send the Onboarding URL as a link to the end-user's mobile phone, make sure to include the
phoneNumbervalue and set thesendSMSparameter totrue. This will send an SMS with the onboarding link.When the end-users select the link they will be redirected to the FrankieOne-hosted onboarding page.
The SMS content is configurable along with the expiry of the URL. To configure the SMS content, please contact Technical support.
Sample Response format
{
  "status": "success",
  "url": "https://verify.deve.frankie.one?=vJ2GKbXSHkVyt3e3uSXNk2",
  "urlExpiry": "string",
  "entity": {
    ...
The Onboarding URL will be returned ("url": "value"). You can take this value and share it to your end-user to complete the onboarding process.
Here's the complete response format:
{
  "status": "success",
  "url": "https://verify.deve.frankie.one?=vJ2GKbXSHkVyt3e3uSXNk2",
  "urlExpiry": "string",
  "entity": {
    "addresses": [
      {
        "addressId": "string",
        "addressType": "string",
        "buildingName": "string",
        "careOf": "string",
        "country": "string",
        "endDate": "string",
        "extraData": [
          {
            "kvpKey": "string",
            "kvpType": "string",
            "kvpValue": "string"
          }
        ],
        "longForm": "string",
        "postalCode": "string",
        "region": "string",
        "startDate": "string",
        "state": "string",
        "streetName": "string",
        "streetNumber": "string",
        "streetType": "string",
        "suburb": "string",
        "town": "string",
        "unitNumber": "string",
        "unstructuredLongForm": "string"
      }
    ],
    "dateOfBirth": {
      "country": "string",
      "dateOfBirth": "string",
      "locality": "string",
      "unstructuredDateOfBirth": "string",
      "yearOfBirth": "string"
    },
    "entityId": "string",
    "entityProfile": "string",
    "entityType": "string",
    "extraData": [
      {
        "kvpKey": "string",
        "kvpType": "string",
        "kvpValue": "string"
      }
    ],
    "gender": "string",
    "identityDocs": [
      {
        "country": "string",
        "createdFromScan": true,
        "documentId": "string",
        "documentStatus": "string",
        "extraData": [
          {
            "kvpKey": "string",
            "kvpType": "string",
            "kvpValue": "string"
          }
        ],
        "idExpiry": "string",
        "idIssued": "string",
        "idNumber": "string",
        "idSubType": "string",
        "idType": "string",
        "manuallyModified": true,
        "region": "string"
      }
    ],
    "name": {
      "displayName": "string",
      "familyName": "string",
      "givenName": "string",
      "honourific": "string",
      "middleName": "string"
    }
  }
}
To learn more about our onboarding API, please visit the Onboarding API reference.
Step 2. Open the Onboarding URL in the native or web application
Once the Onboarding URL has been generated, you can now use it on your native or web application. The steps are similar with using OneSDK (as described here), but, instead of creating a web app that contains a simple HTML page, you now only need to insert the generated Onboarding URL into your code.
For example, the generated Onboarding URL is https://verify.dev.frankie.one?t=dFLfq4pbfMfnWUZ4SR8W5i.
You can use this URL in your native application as in the following examples:
Sample code for native application:
You can use the following example for your Android application:
webAppInterface = WebAppInterface(requireContext())
        binding.webView.apply {
            webViewClient = MyWebViewClient()
            webChromeClient = MyWebChromeClient()
            addJavascriptInterface(webAppInterface, "Android")
            loadUrl("https://verify.dev.frankie.one?t=dFLfq4pbfMfnWUZ4SR8W5i">)
        }
Additionally, to learn more about using OneSDK with native apps, visit Using OneSDK with native apps.
Using the Portal to send onboarding URL.
The Hosted OneSDK Onboarding URL can also be sent to the onboarding end user using the Portal.
Enable Onboarding URL sending through the Portal
The feature to send the Onboarding URL using the Portal is enabled through your application configuration settings, and done by FrankieOne during your onboarding.
To enable or disable it for your account, please contact Technical Support.
If this feature is enabled during your onboarding with FrankieOne, you can send the Onboarding URL to your end users through the Portal.
To do so, do the following steps:
-
Open the entity profile page of the end user. (If the entity hasn't been created, select the New Profile button to create a new one.)
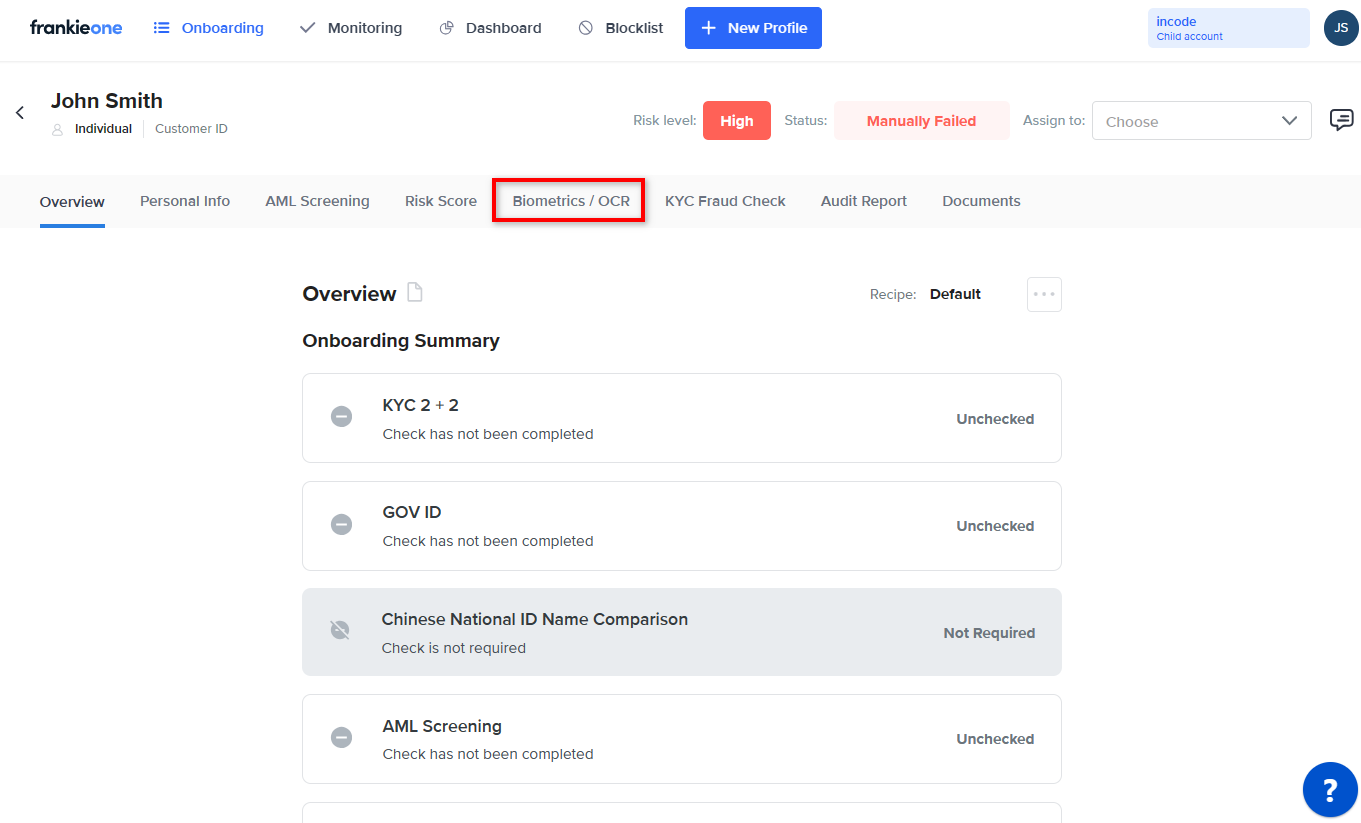
Profile page
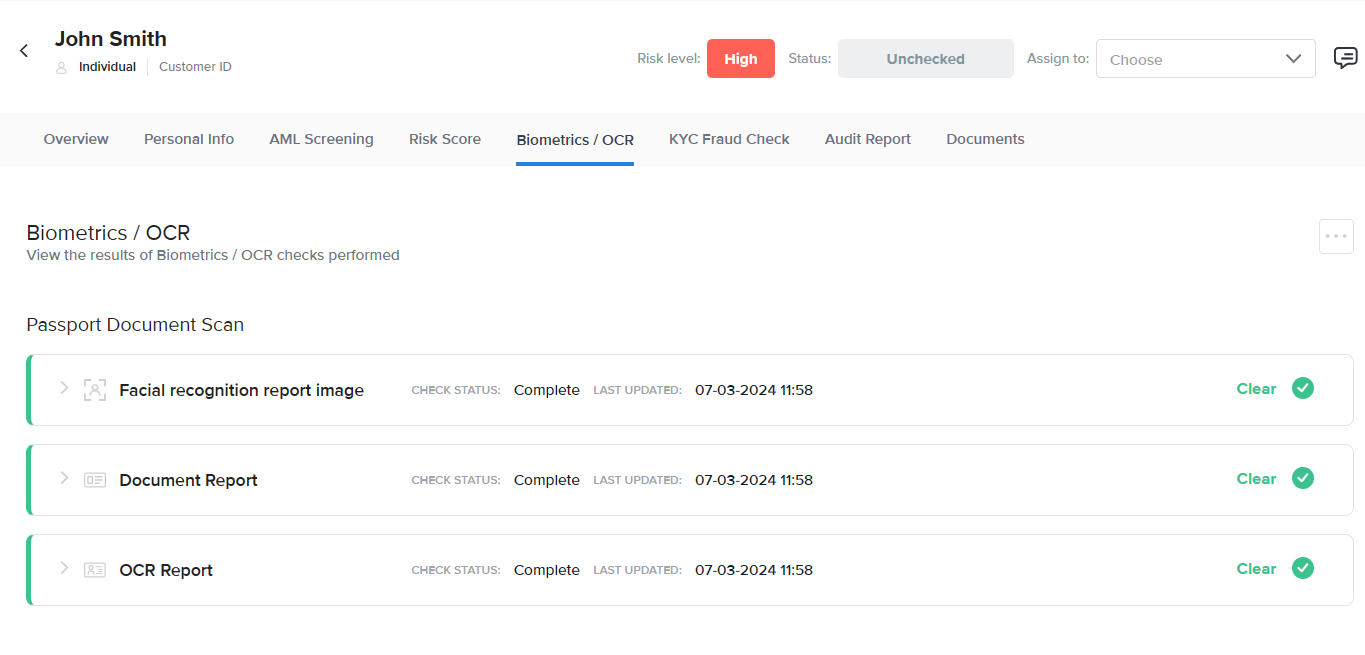
-
Select the Biometrics/OCR tab.
-
Open the Biometrics menu on the left side and select Start Biometrics. This will open the Start Biometrics/OCR process modal.

-
Select how you want to send the Onboarding URL to your end user, either by SMS or copying the link and sharing that with them.
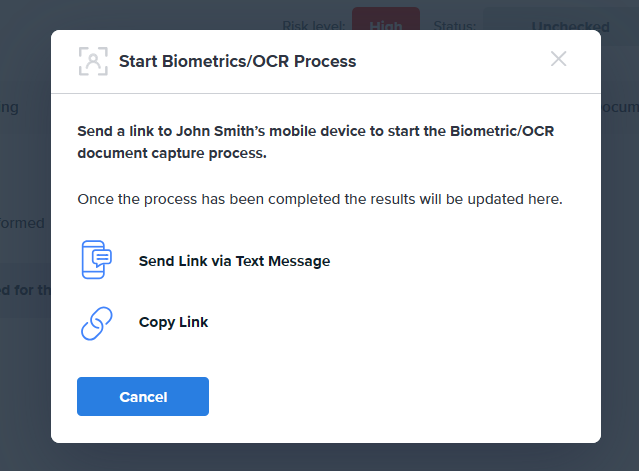
Start Biometrics/OCR Process modal.
-
If you select, Send Link via Text Message, you'll need to enter the mobile phone number of the end user, and any internal comments you want to add. Select Send Link to send the Onboarding URL.
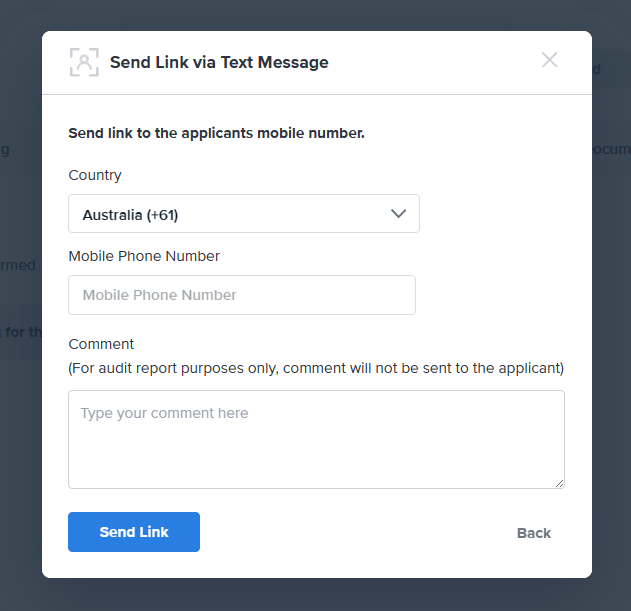
Send Link (Onboarding URL) via Text Message.
-
If you select Copy Link, you'll be presented with the link to copy and share. Select Copy. Select Done afterwards.
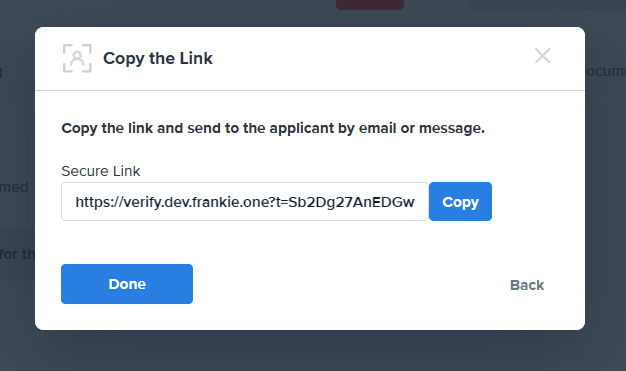
Copy Onboarding URL modal
Once the end user opens the Onboarding URL, they will be required to open it in their mobile device so that the end-to-end process of identity verification is completed using the phone's camera (for OCR and liveness check).
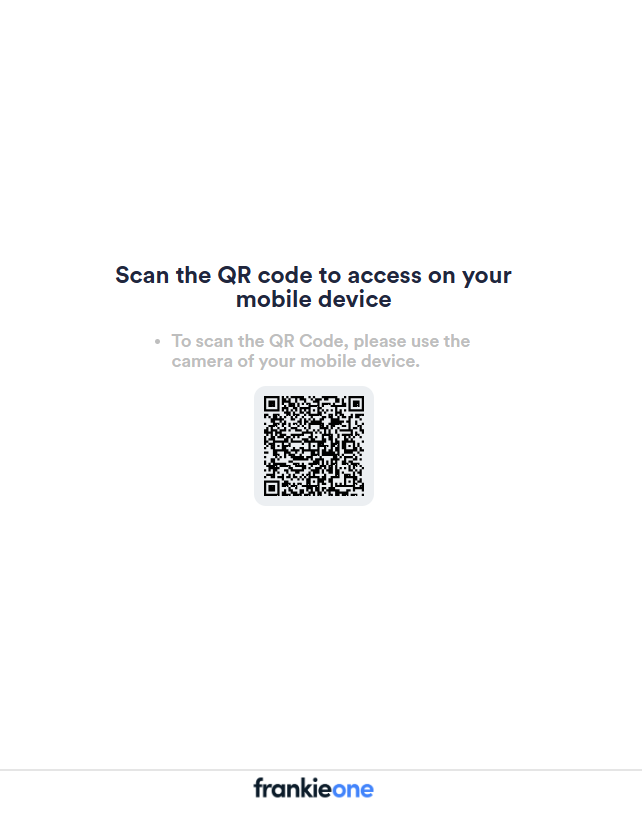
QR code to open Onboarding URL on a mobile device.
After the end user completes the onboarding steps on his mobile device, the entity profile will be updated with the collected information.
Once the information has been collected and added into the entity profile, you can continue managing the profile.
Updated 4 months ago